Hi Folks! In this post, we will explore how to configure the SXA Map component.
This is the first post in the series of an SXA Map component.
- SXA Map component
- SXA Map component Part 2 With Search results and Location Finder
- SXA Map component Part 3 Show distance in POI Marker
- SXA Map component Part 4 Show POI markers for the same coordinates
- SXA Map component Part 5 Filter locations with Radius Filter or Custom Filter Slider components
Prerequisites:
- Sitecore 10.2 instance with SXA (If you have an older Sitecore version with SXA, still give it a try).
- Google Map API key – Follow this below link to generate the google map key.
- https://developers.google.com/maps/documentation/javascript/get-api-key
- A tenant with a site.
The Map is a module. To ensure that the Map module is installed or not when you created a site, traverse to a site item – /sitecore/content/tenant/site. In the Module field, it should have a “Maps Site Setup” entry in the selected list.
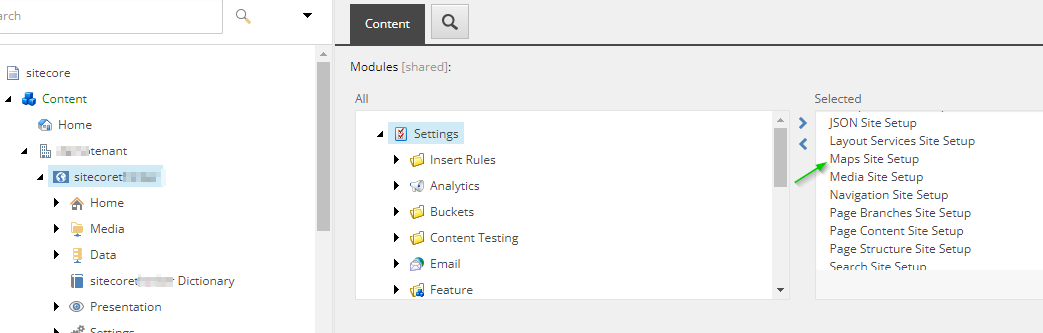
Maps Site Setup in the Site Module list
If not found, then you can right-click the Site item > Scripts > Add Site Module and select Maps and click OK to install.
If you create a new Site, then do select the “Maps” module.
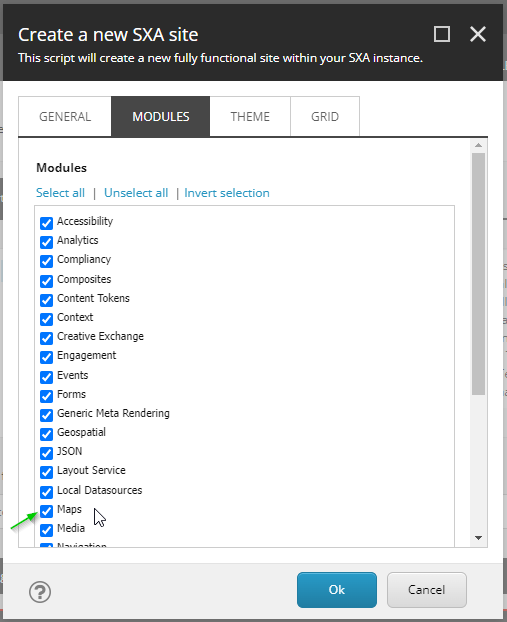
Maps module
Let’s configure the Map component on the page.
Under the Home item, create an item from the Page template named “Location Demo”. Create one more item named “Location Listing” under “Location Demo” and open it in the experience editor. Or you can browse the existing page.
By default, we have 3 placeholders – header, main, and footer.
Select the main placeholder, click on “Add here” to add a rendering > Maps > Map, and click Select.
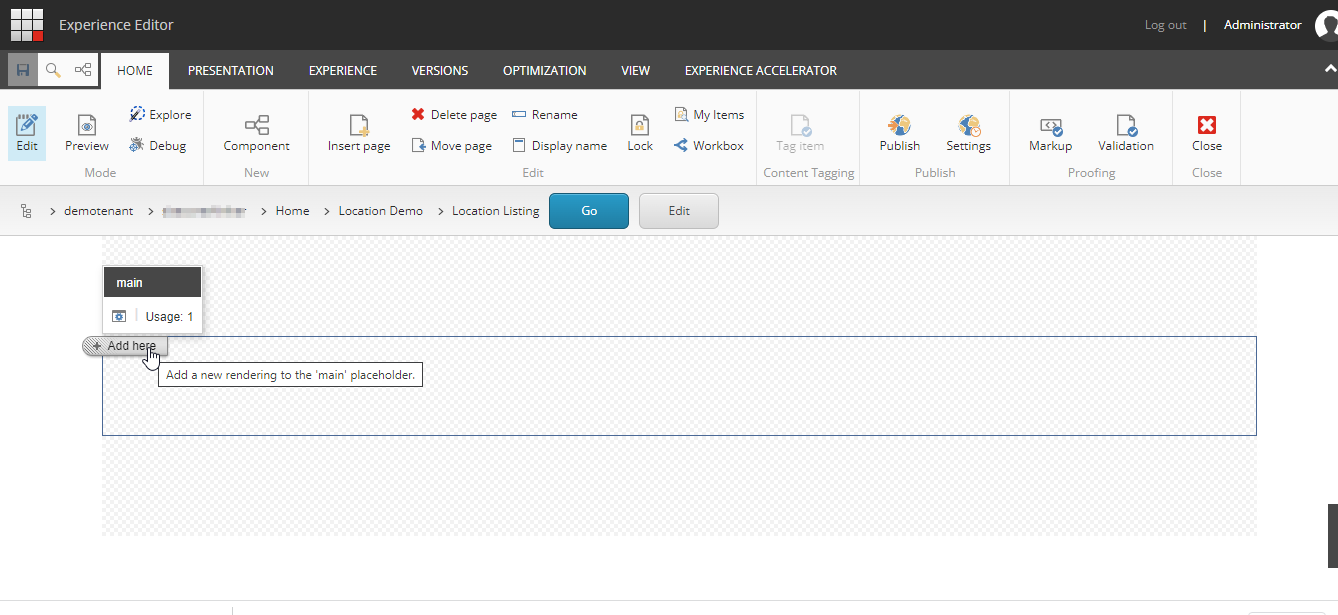
Add here on the main placeholder
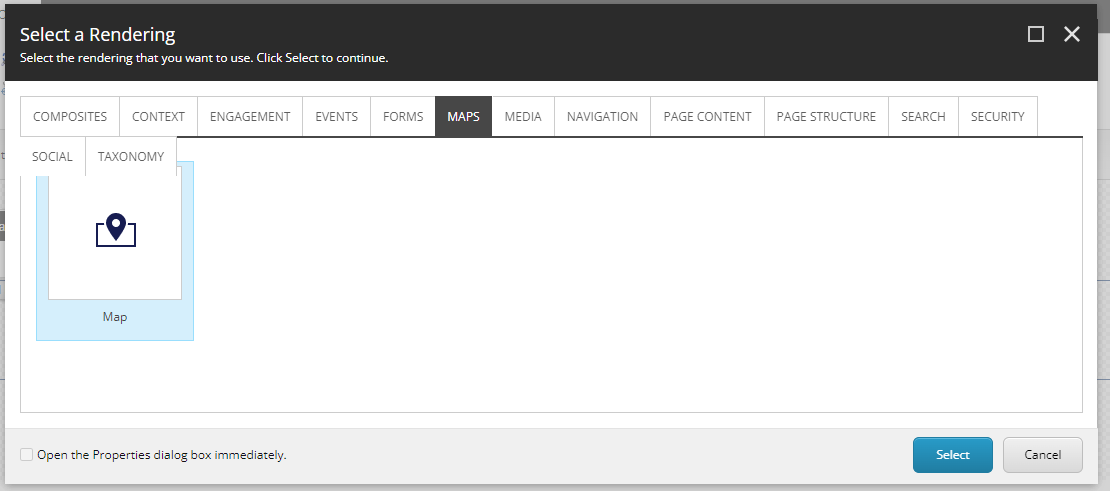
Add Map rendering onto the page
Create the Map data source either under the current page Data item or under the Site Data Maps item.
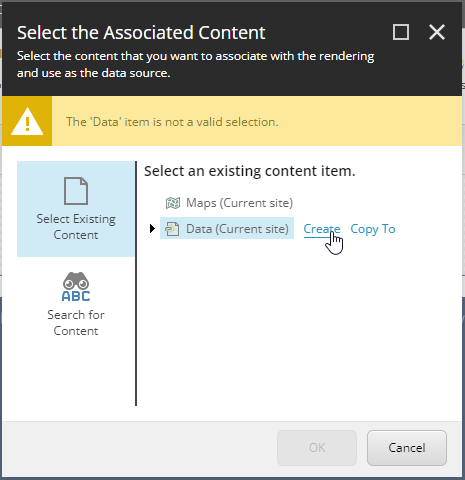
Create a Map data source
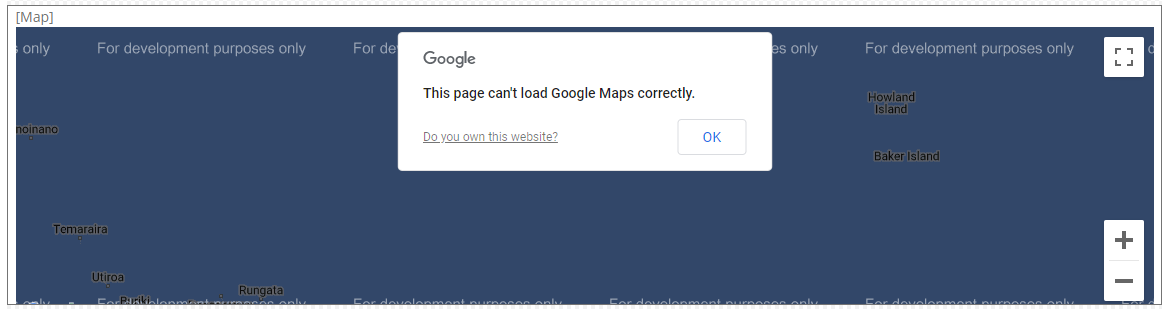
The map does not load
Save the page.
The map does not load. To resolve this, we must provide the Map key. In content editor, traverse to Map provider item under site settings item – /sitecore/content/tenant/site/Settings/Maps Provider
In the Key field, provide the Map key you have generated as part of the prerequisite. Save the Maps Provider item. Reload the experience editor page where Map is added. It should be resolved now.
If the issue still persists then please check the developer tool console log. Reasons could be billing issues or the website restriction related to the allowed domain or IP. To fix, manage the settings accordingly in Google cloud console > Select your project > API and services > credential.
Note: If you have a requirement for Bing, then you can provide its API key.
So far, we have added a Map component with a Data source and configured the key. But it does not show any locations or Map markers because we are yet to supply location information in the POI field of the Map data source. So let’s add some locations to the map.
Traverse to /sitecore/content/tenant/site/Data/POIs
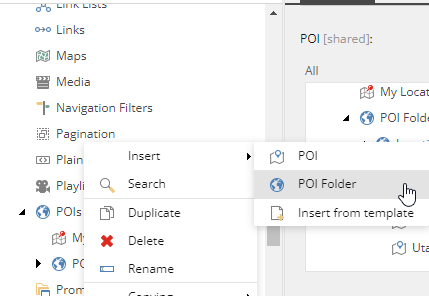
Add POI folder
Right-click POIs item > Select the POI Folder and provide the item name and click ok.
Right-click the newly created POI Folder item > Select POI and provide the location name as item name and click ok.

Create the POI items as many as you need for each location.
I have the below structure.
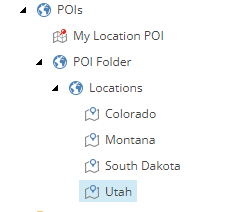
Location POI items
It is good to have the POI folder to group the locations. Moreover, we can select the POI folder directly in the POI field of the Map data source instead of selecting each POI item.
POI item has the below properties to store the location information.
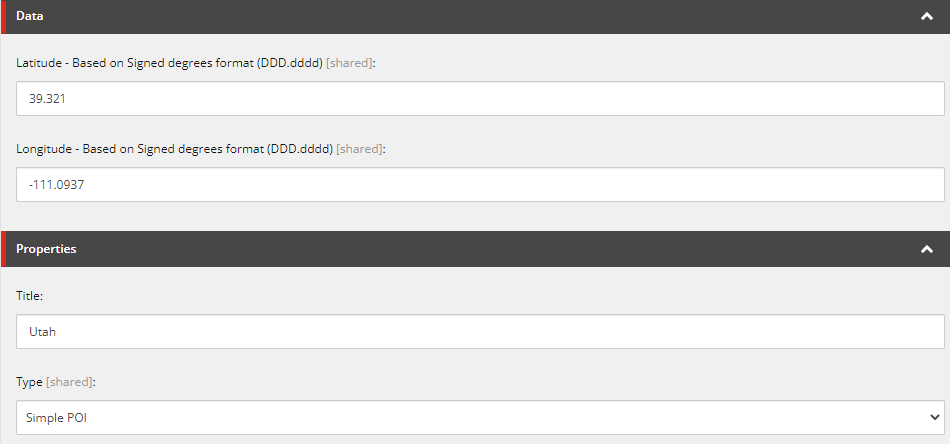
POI item which stores all information about a location
Supply the latitude and longitude of the given location.
Be careful with signs. There are multiple ways to get it. You can google the given location. For example Utah coordinates.
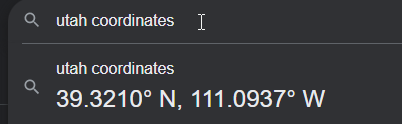
Here we don’t get to see the sign. Scroll down the result to find coordinates with signs as shown below.
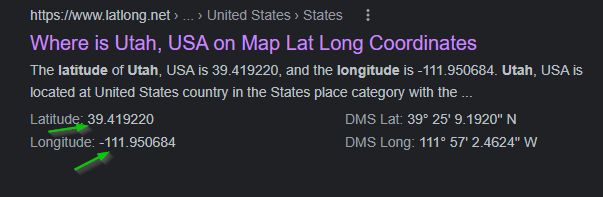
Copy the coordinates from the left with a sign
Provide the Title field value and Simple POI in the Type field.
Type field has the marker type from /sitecore/content/tenant/site/Presentation/POI Types. Here each POI type is mapped with a variant to represent the marker in the Default variant field.
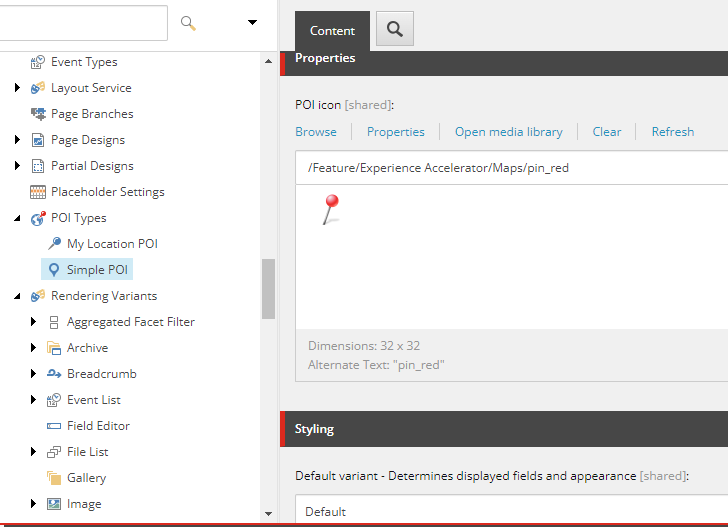
POI type item properties
The variant is defined under /sitecore/content/tenant/site/Presentation/Rendering Variants/POI
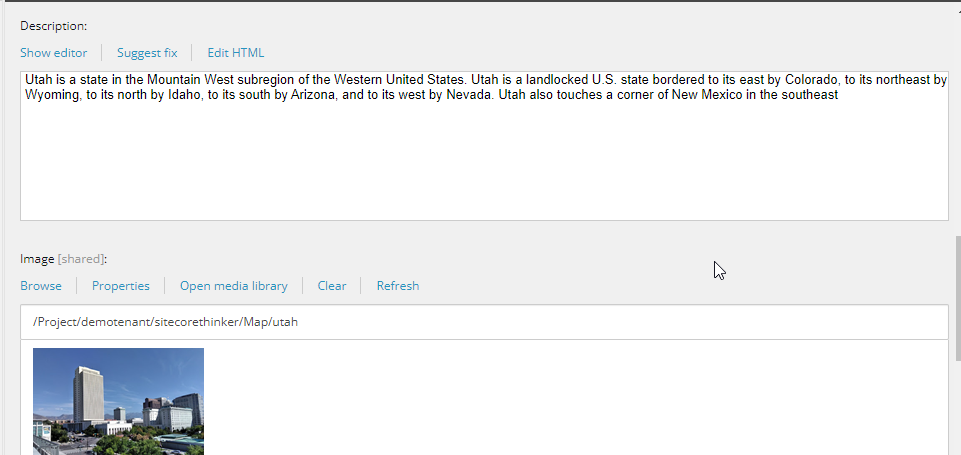

Provide the description, image, and POI page field values.
Make sure to provide the coordinates in the POI item otherwise, it will not appear on the map.
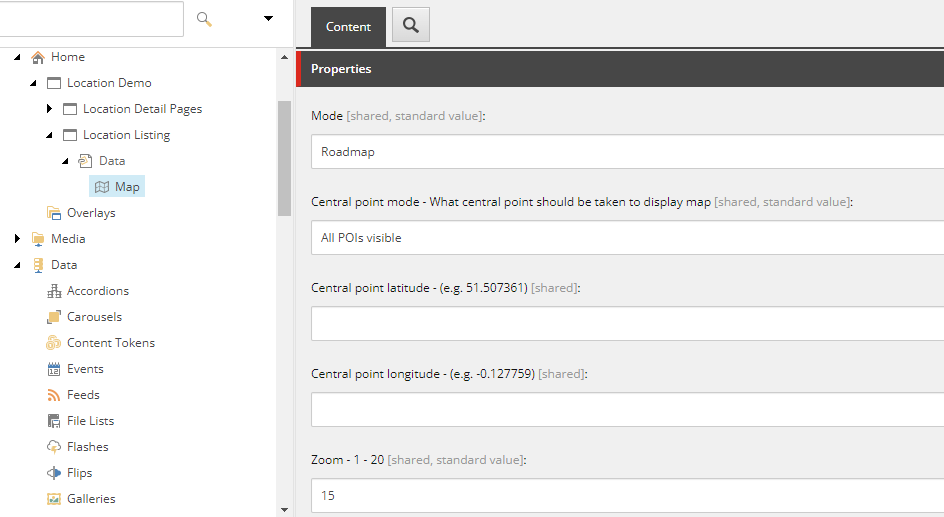
So, once you have created POI items given all the field values. Traverse to Map data source item. In my case, it is under the current page data item.
Map data source
Above are the default values. Change it as per your need. Central point mode has the below 3 options which are very useful.

Central point mode field in Map data source
All POIs visible – All the location markers are visible on page load.
Current location – On page load, the browser prompts to allow the current location access if not allowed. Reset the current location access if it is blocked at the browser level.
Defined Central Point – If this option is selected, then supply the field values for Central point latitude and Central point longitude else it will be considered as 0 (Null Island) 😉
Let’s keep the default – “All POIs visible” for testing purposes.
Zoom – Default is 15. Compliments “Current location” and “Defined Central Point” options. Higher the number to zoom in, lower the number to zoom out.
Map data source – POI field for locations mapping
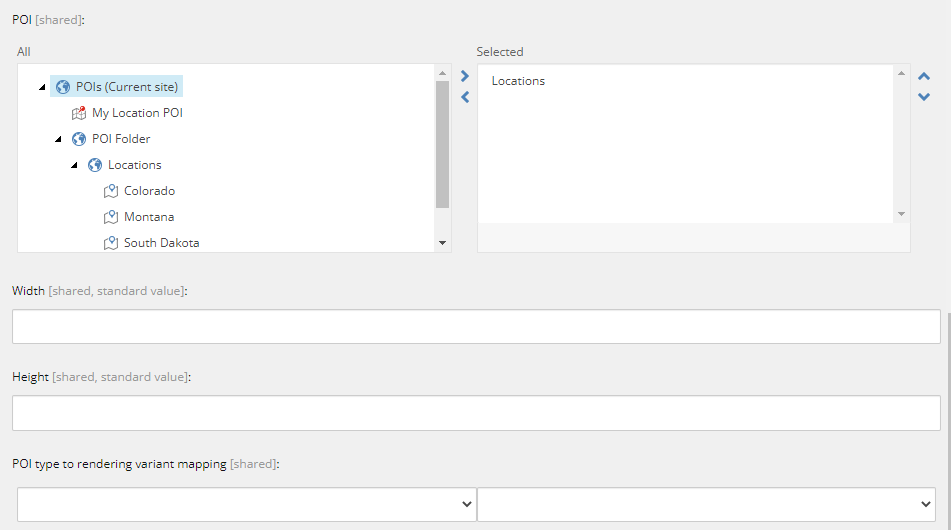
In the POI field, select the individual POI items or the POI folder for location mapping. If you want to consider all the locations, you can just select the Current site POIs item itself.
Save. Reload the page in the experience editor where Map is added.
Based on the above configuration below is the output.
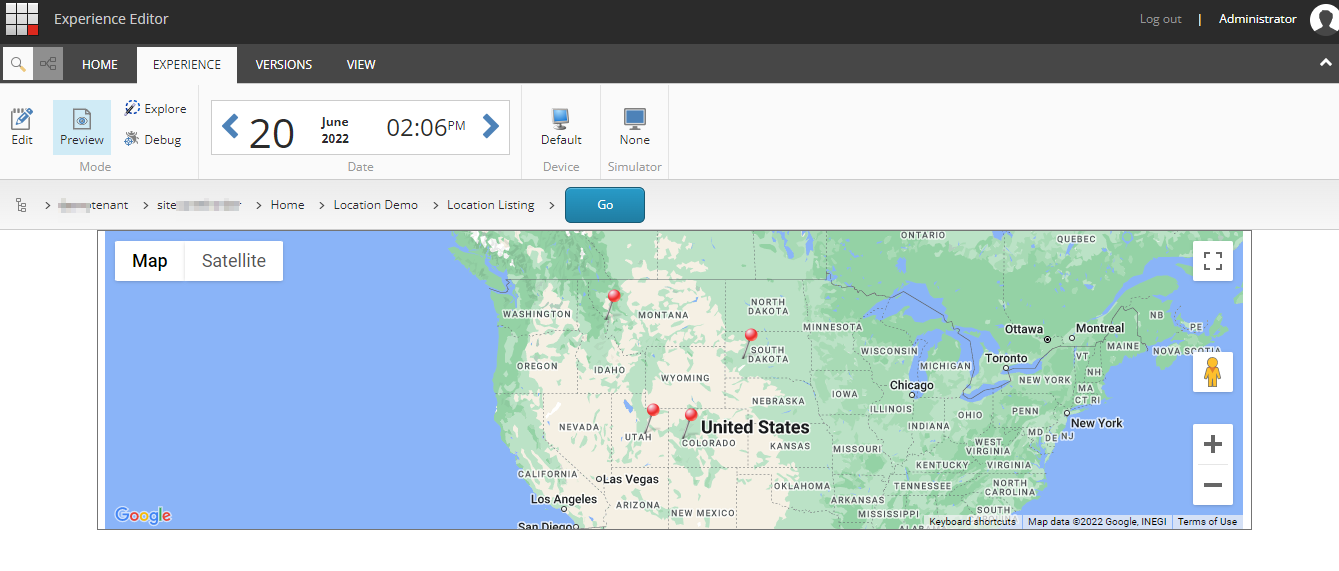
Map

POI Marker
Hope this helps.
Check out the Sitecore SXA Map Part 2 to know more about Map usage in conjunction with Location Finder and Search Results components.
Happy Sitecore SXA Mapping 🙂