
One of the biggest challenges for implementing personalization at scale is managing content. You not only need to come up with personalized content for each of the personalization scenarios you want to implement, but you need to manage the review and approval process as well as ensure you can distribute it properly across the channels where that content is needed.
Sitecore Personalize is an excellent tool for managing the execution of a personalization solution. With decisioning capabilities to select the right experience, the ability to inject personalized experiences into websites and the ability to push experiences to other channels via triggers and API’s, Sitecore Personalize gives you a great foundation for building personalized solutions.
What it doesn’t do a great job is managing the content for those experiences. Yes, you can have marketers specify the parameters of the experience within an experiment or experience and you can even use Offer templates and offers to create reusable pieces of content across experiences, however this does not provide a central way to manage content types and approve them.
Fortunately, Sitecore Personalize is extensible and can support pulling content from other sources. And Sitecore has a few other products for managing content. While XP, XM and XM Cloud have robust API’s and support Experience Edge for providing low latency API’s for integrating into personalization, I decided to use this as an opportunity to work with Sitecore’s latest headless CMS offering: Content Hub One. It publishes content to Experience Edge as well, ensuring that the latency in fetching content is minimized.
I believe the techniques described for integrating Content Hub One with Sitecore Personalize will work if trying to work with any other CMS with open API’s.
The Plan
Instead of starting from scratch, I am looking to build on top of the proof of concept I blogged about integrating Sitecore XP Pattern and Profile card values with Sitecore Personalize. Read the article for full details, but this approach used the streaming API’s to push XP profile card values using JavaScript. It then used that data in a decision model to select and offer and present an alert bar based on whichever profile card scored over 50%.
I want to extend that approach to pull additional content from Content Hub One in addition to the offer selected by the Decision model.
To get there and connect all the dots, we’ll need to do the following:
- Create the Content – Use Content Hub One to define the content types and sample content needed for personalization.
- Get the Queries Right – Use the GraphQL playground to design a query that will get you the content details you need.
- Configure the Connection – Create a connection that can authenticate and run the graphQL query.
- Extend the Decision Model – Update the Decision Model to call into our connection and get the content details.
- Update the Experience – Update the web template to bind to the additional content provided by the decision model.
Once all of that is done, we’ll be able to test our experience in our sandbox and see a personalized message that includes content from Sitecore Personalize and Content Hub One.
Create the Content
If you haven’t looked into Content Hub One before, Martin Miles has posted an in-depth review of using it to build a sample site that I recommend reading. For our purposes, I just wanted to create a simple content type with additional content to use in my personalized experiences.
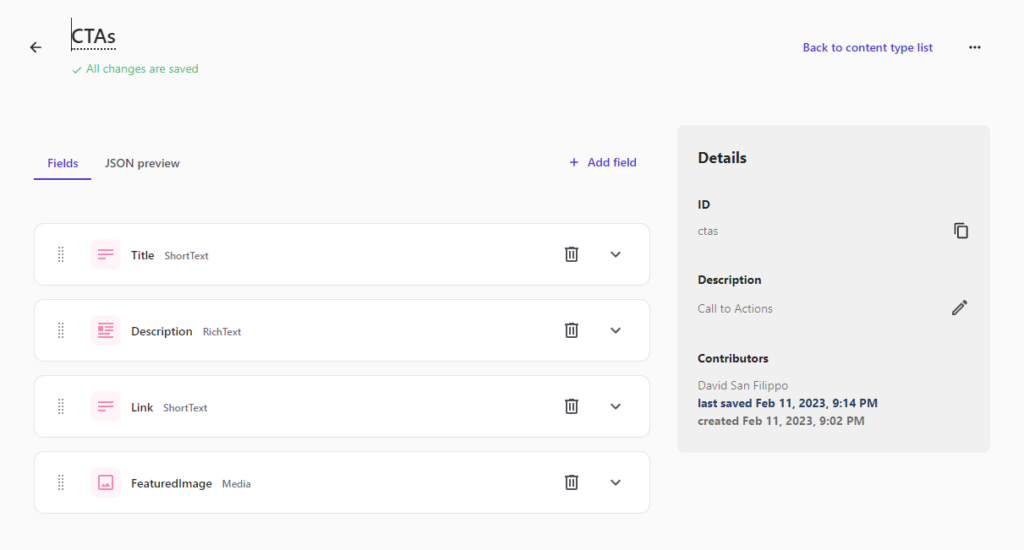
Once logged into Content Hub One, you can go to “Content Types” in the main navigation and click the “Add type” button in the upper right hand corner. This will allow you add a few fields that make up your type. To keep things simple, I added fields like “Title,” “Description,” Link,” and “Featured Image.”
With that done, the next step is to add content for each of the three “profile card” matches I want to provide personalized content for: “Everyday Health,” “Fitness Fanatic,”, and “Foodie.” To set that up, I selected “Content” from the main navigation and clicked the “Add content” button in the upper right hand corner, selecting “CTAs” (the name of my new content type).
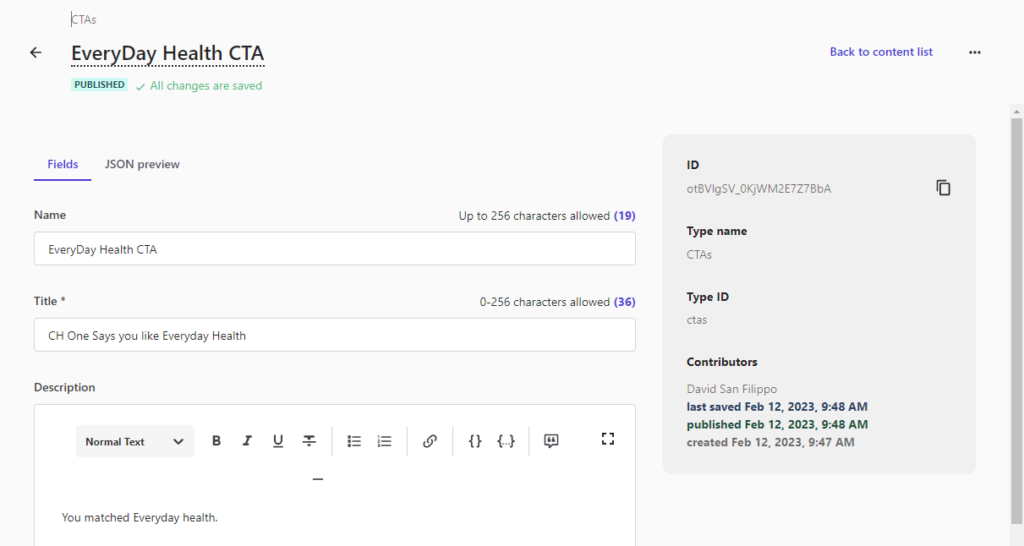
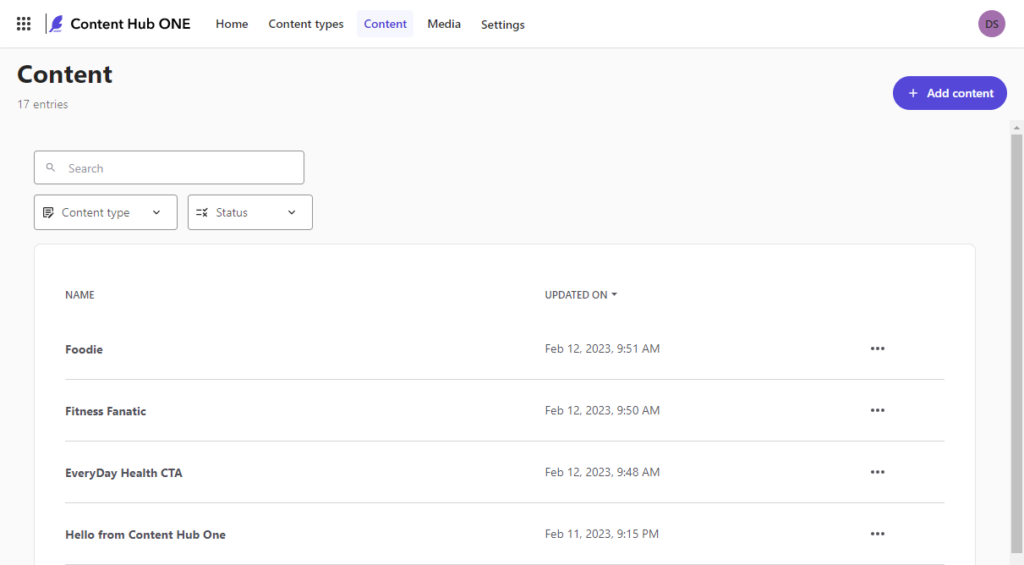
For each piece of content, I needed to separately go to the “Media” tab and upload and image. I also made sure to publish both the images and the content items themselves. When you’re done, you’ll have all 4 content items listed when you view the Content tab. At this point it is worth noting the ids of each of the items as you’ll need that to query them specifically.
Get the Queries Right
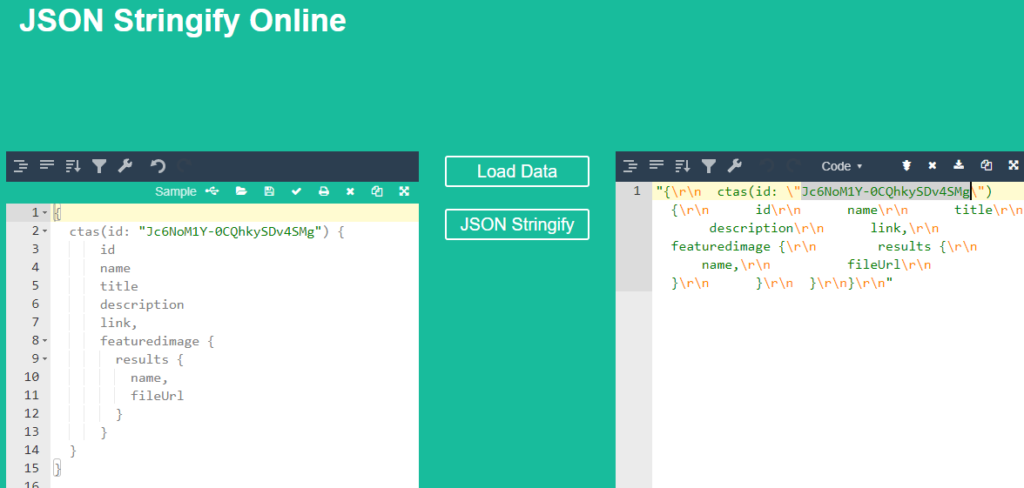
The Content Hub One query examples provided give you a good start for figuring out how to query by Id and get details like your media items url. Here’s the query I ended up using to get all the details for one CTA by Id.
{
  ctas(id: "Jc6NoM1Y-0CQhkySDv4SMg") {
      id
      name
      title
      description
      link,
      featuredimage {
        results {
          name,
          fileUrl
        }
      }
  }
}
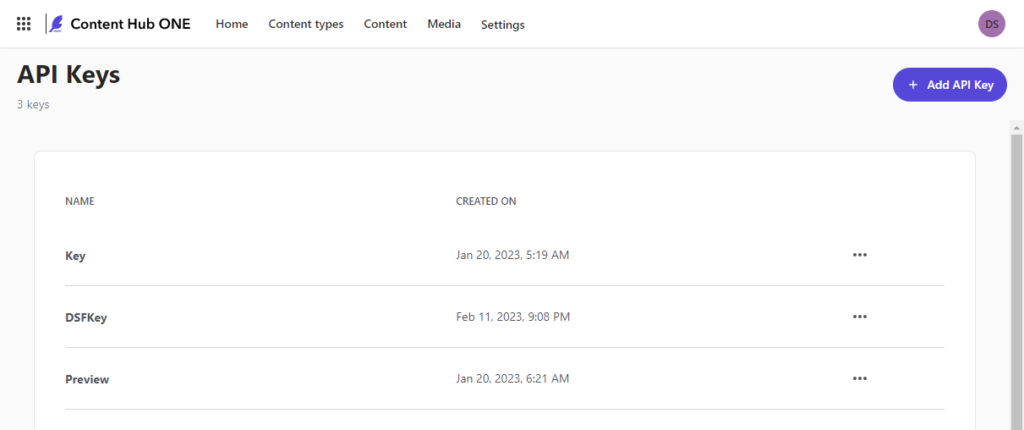
Content Hub One also gives you a GraphQL playground for testing your queries to make sure they return the right data. To use that, you’ll need to go into “Settings” > “API Keys.” Once there, add an API Key giving it a name and then record the key it gives you as you’ll need to add it as a header when connecting to the graphQL service.
With that in place, you can open the GraphQL playground and test out your query. Be sure to add your copied API Key to the http header.

Configure the Connection
With a query ready to go and an API key created, we are ready to start setting this up in Sitecore Personalize. To do this we’ll need to create a connection. This is accessible under “Developer Center” > “Connections.”
Now, here’s where things get a little weird.
There are three types of connections and only two can be applied to a “Decision Model:” “Data System” and “AI.” Data Systems can be used for service calls that require no dynamic inputs. They do not support parameters. While we could create a connection of this type and run a graphQL query, we could not pass the ID into it, and would need to return all of our CTAs. While this might work, I really wanted a solution that supported parameterization.
Even though it’s called “AI” the connection doesn’t have to do any AI or machine learning. It just needs to allow you to call a service where you can pass inputs into it and configure those inputs in your decision model.
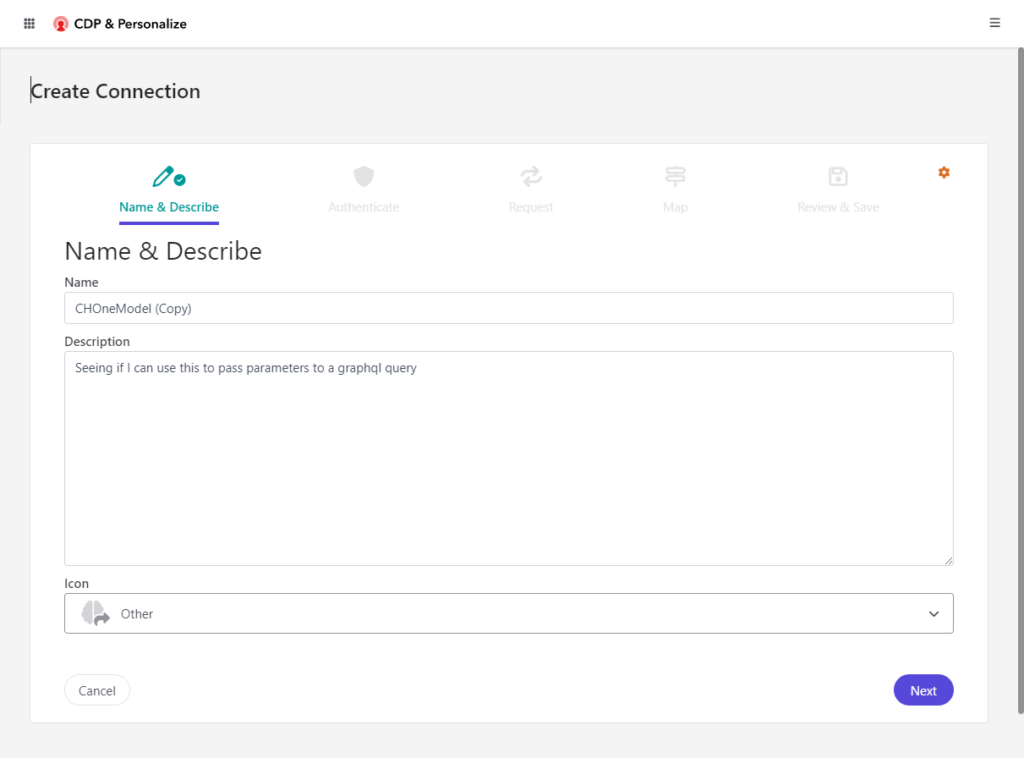
So, when you click “Add Connection,” you need to select “AI” as the Type.
Give it a name, description, select from one of the icons and click “Next.”

Since Content Hub One authorizes with the API key as a Header Value, select “None” and click Next.

Change it from “Get” to “POST” and enter the graphQL endpoint. Here I’m using the published endpoint but note that there is a draft end point. I could imagine creating another connection that uses the draft endpoint for testing.
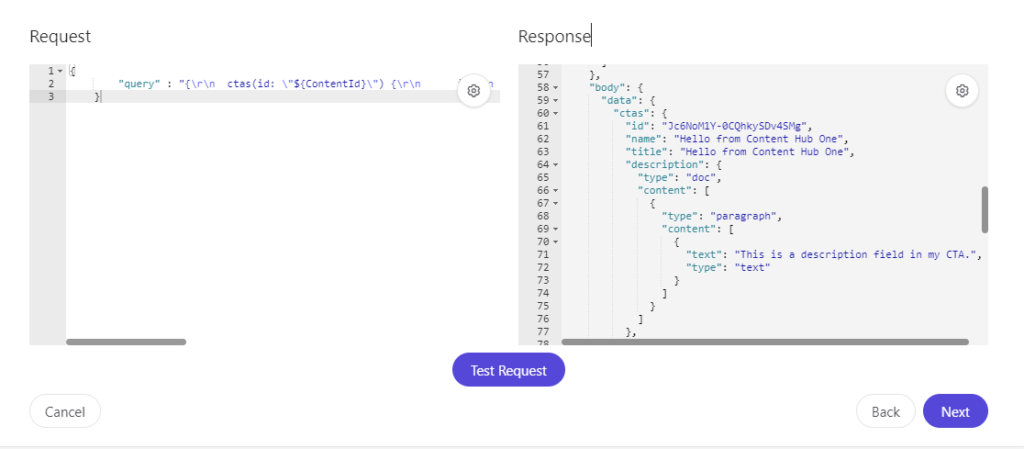
Add a header called “X-GQL-Token” and put your API Key as the value. Next, we’ll need to setup our query in the Request box.
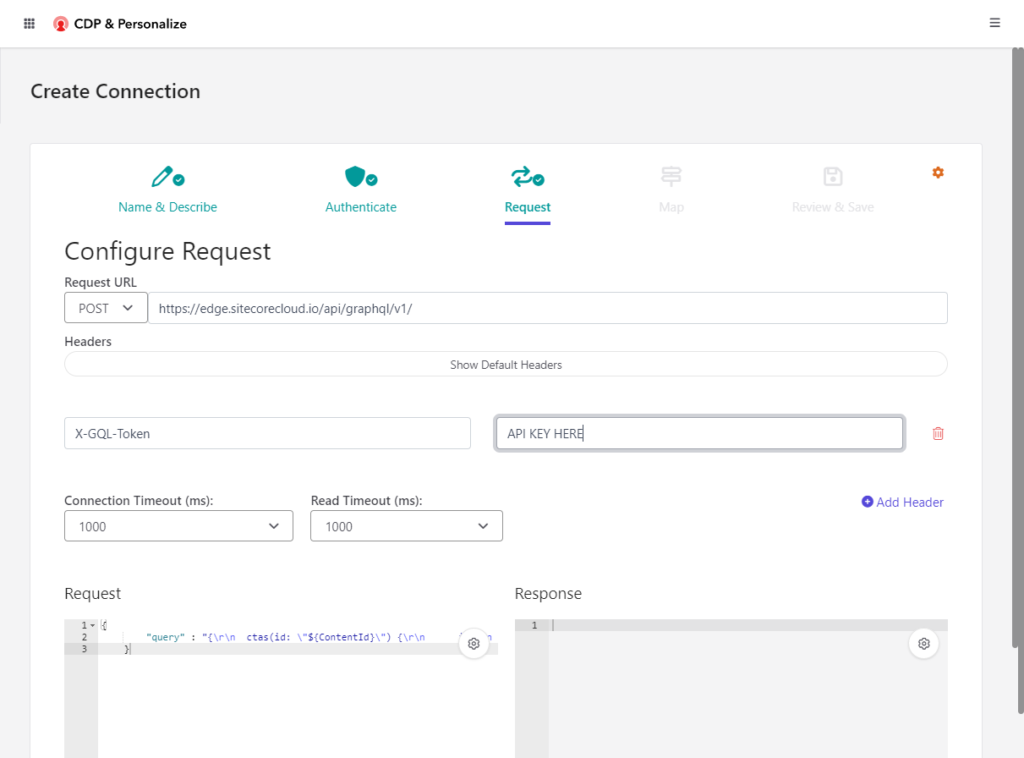
To do that, we’ll need to provide it as { “query” : “query text” }. Since we built our query in the GraphQL playground, we’ll need to properly format it as a string here. There are online tools that can help you with this.
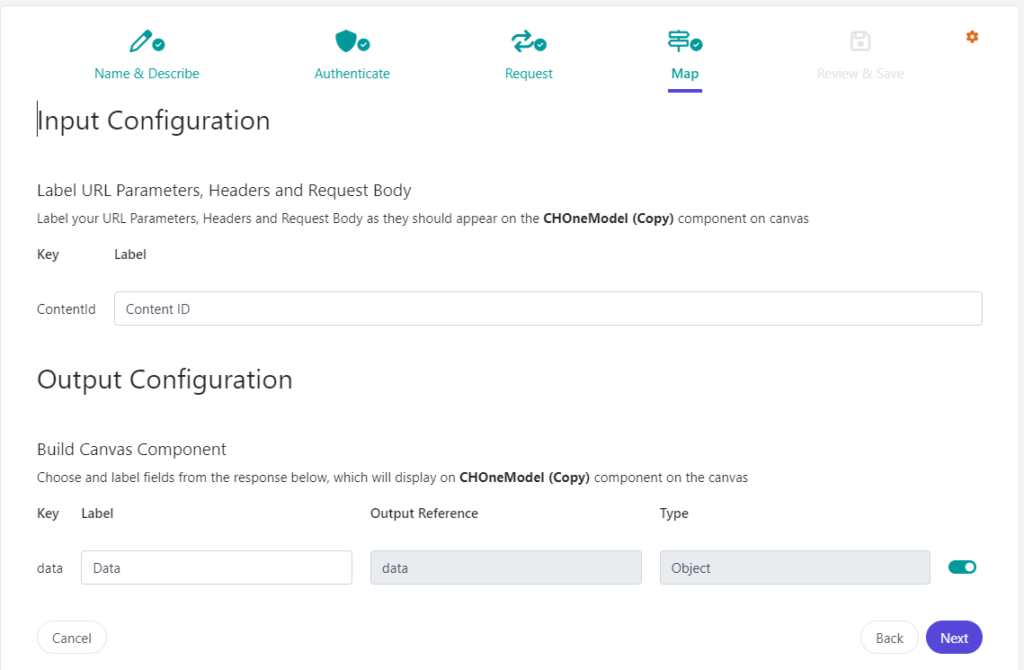
You’ll also need to replace the hard coded Id with a JavaScript Template literal. I used “${ContentId} as the parameter name. To advance, you’ll need to test the connection. This will detect the parameter and prompt you for an Id.
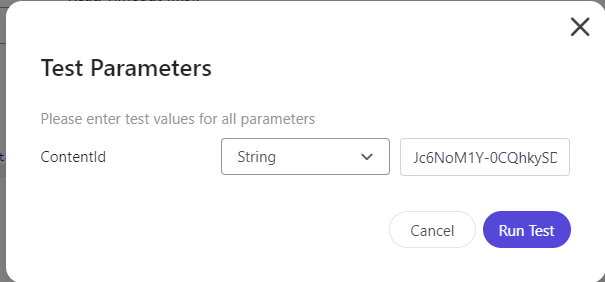
You’ll need to specify a valid one that returns valid results. Once that’s done you can then click “Next.”
Next you can provide a friendly name for your input field and validate the output looks appropriate. Once your satisfied you can click Next.
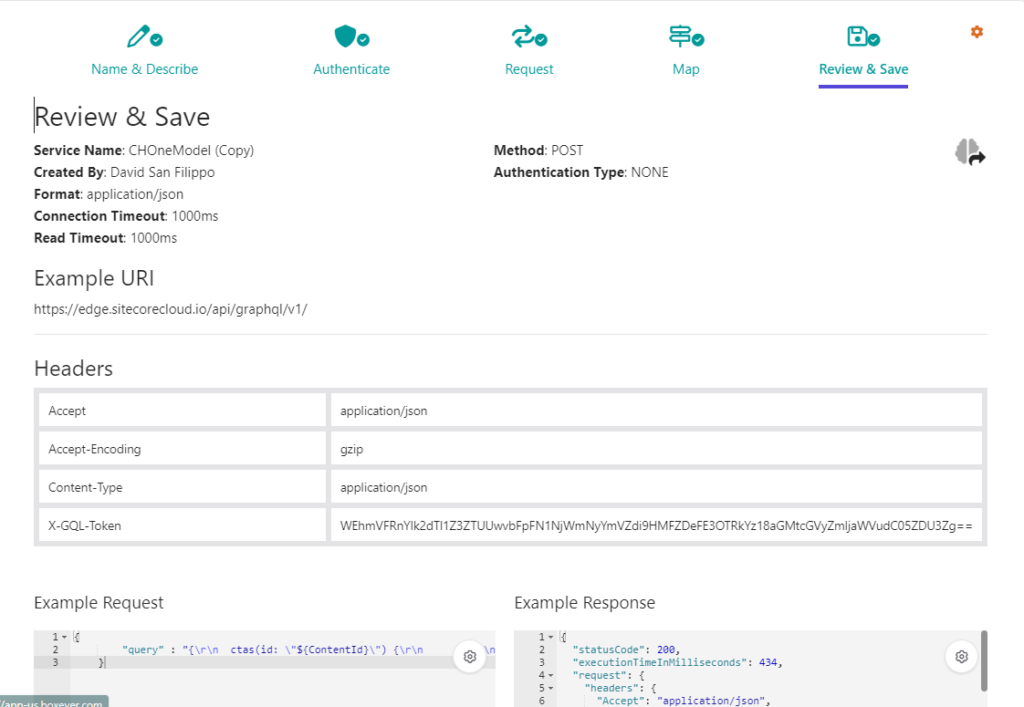
Finally, you can review everything before saving your new “AI Connection.”
Extend the Decision Model
Now that we have the connection, we need to extend our decision model to call it. Since we already built out a decision model that uses a programmable to figure out which profile card matches best and a decision table that maps the programmable’ s results to “Offers,” we’ll need to extend the decision table to also provide the Id of the Content Hub One content Item we want to pass to our new connection.
To do that, we open the decision table and add a new “string” output column called “ContentId.” We can then provide Id’s for each of our offers.

An alternate approach could be to use a programmable to return the id. I also considered adding this as a field to the offer template and use a programmable to return this value but have not figure out it if that’s possible. This current approach works and the interface for configuration isn’t too cumbersome.
Next, we’ll need to drag our AI model onto the canvas. When selected, it will ask to select the connection we created earlier. Once there, you’ll need to connect your decision table to it by dragging the arrow from the decision table to the new shape.
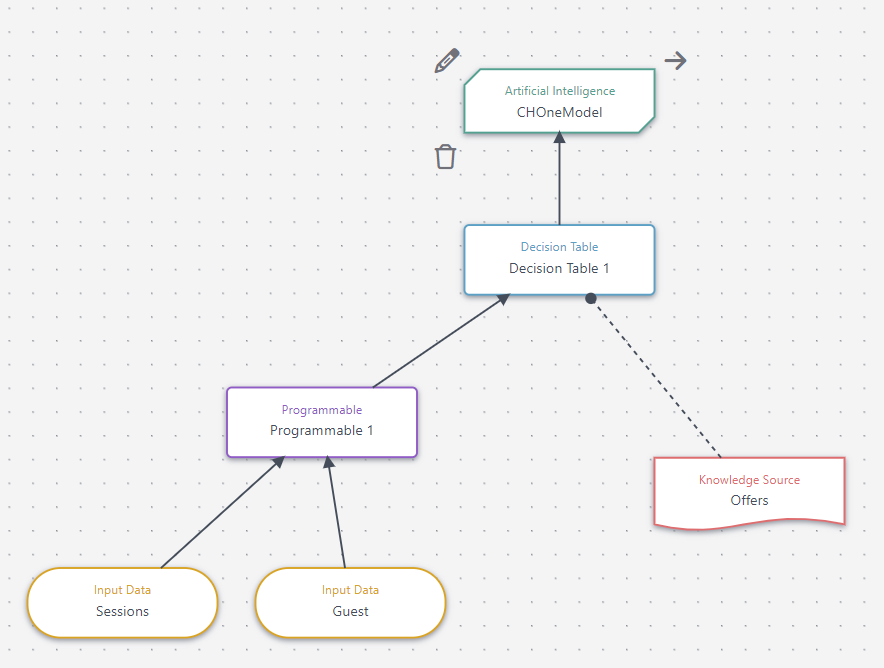
Next, we’ll need to configure the Connection by clicking the “edit” icon next to the connection. This will prompt us map the request input. We can type “ContentId” and it should autocomplete to show the output from the decision table.
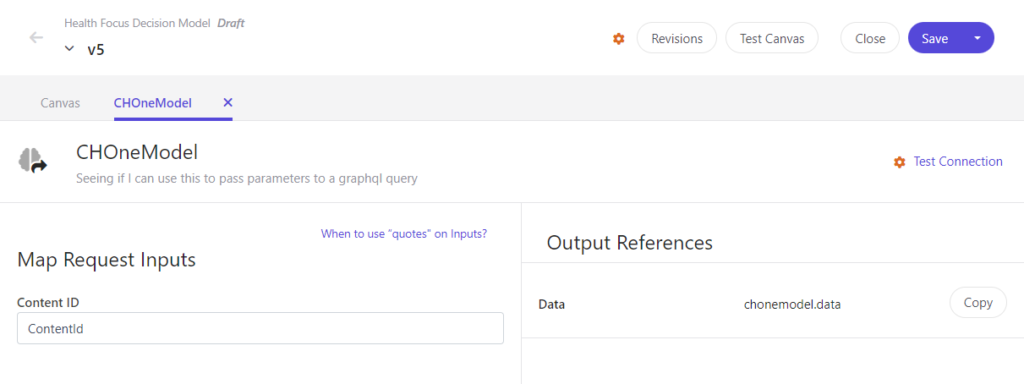
With that in place, all that’s left is to test the model. To do that, click “Test Canvas” and select a guest that has the event history we need.
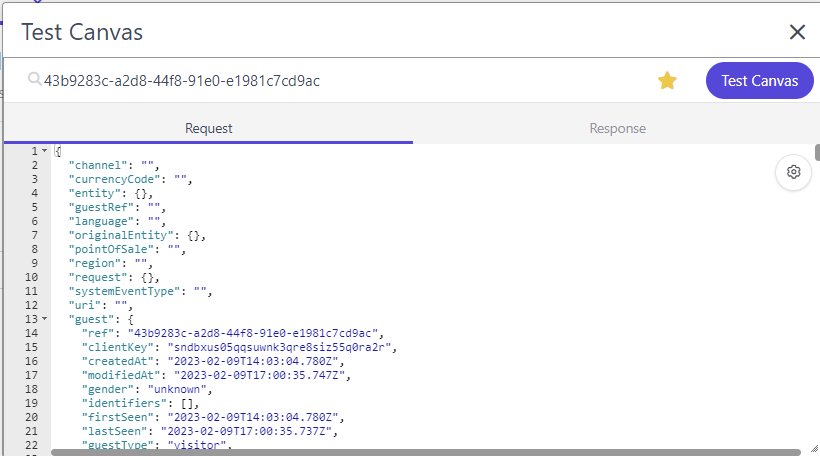
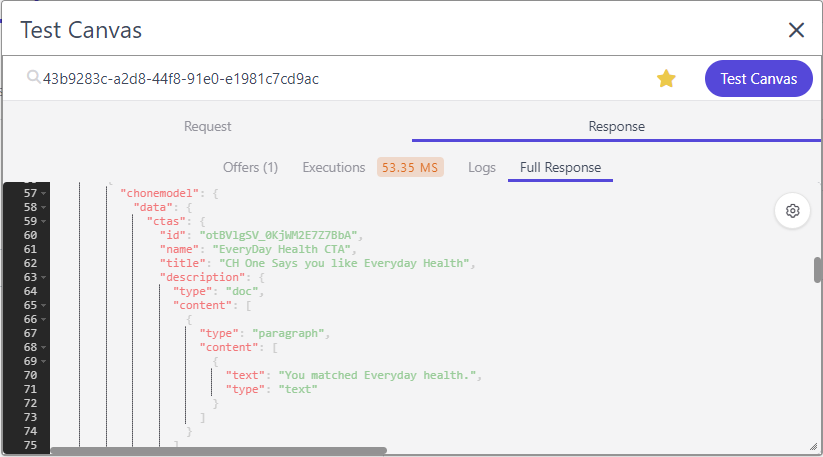
You’ll see the full response includes content from our Content Hub One graphQL query and note that it executed in ~50 ms (not too shabby).
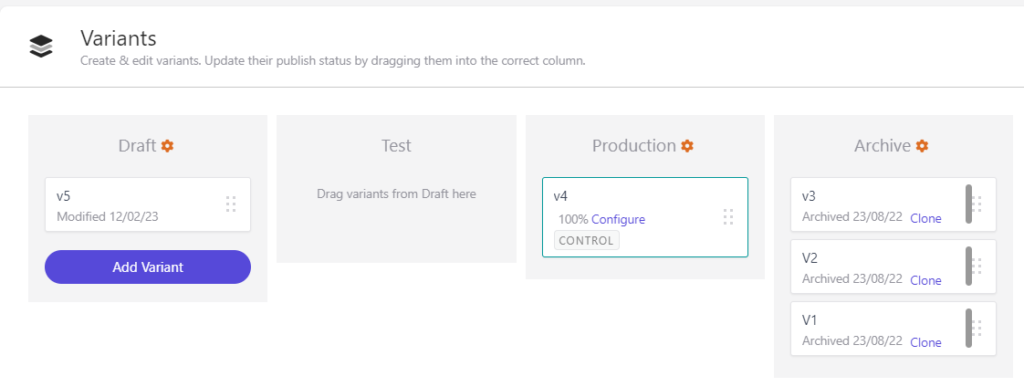
Once you’re satisfied, don’t forget to move the model to production (and move any existing models to archive).
Update the Experience
Finally, we can now update the web experience to make use of the additional data from the decision model and connection. Go into experiences and move it back into draft if you’re experiment is already running. Then go to Edit and Advanced edit which should give you tabs for HTML, JavaScript, CSS, and API.
To access our Decision model, data we’ll need to use Freemarker in the API tab.
<#assign CHOneNode = getDecisionModelResultNode("CHOneModel")>
{
  "decisionOffers": ${toJSON(offers)},
  "CHOneModel" : ${toJSON(CHOneNode.outputs[0].chonemodel.data.ctas)},
  "FeaturedImage" : ${toJSON(CHOneNode.outputs[0].chonemodel.data.ctas.featuredimage.results[0])}
}
Note the assign tag uses a built-in helper function to return the result node based on name. Before discovering that function existed, I tried using index only to discover that the ordering of the result nodes was not consistent from request to request.
Besides mapping the entire model, I also mapped the image. I did that because images return as arrays, and it’s a little painful to try to navigate arrays in Freemarker. This makes it a top-level object that I can then address to get the image url.
A good tip with this is to use the “Preview API” functionality to validate it’s outputting what you expect. Be sure to save before clicking as it will only test what was last saved.
With that done, we can now use the field values when composing our template. Switch to the HTML template and add fields where you want.
<div id="bx_TopBanner">
    <div class="bx_TopBanner__banner">
        <p class="bx_TopBanner__p">
            <span class="bx_TopBanner__p--span" style="display: inline;">
                {{#CHOneModel}}
                    {{[title]}}
                {{/CHOneModel}}
                <img width="100" src="{{#FeaturedImage}}{{[fileUrl]}}{{/FeaturedImage}}"  />

            </span>
            <a id="bx_TopBanner-button" class="bx_TopBanner__p--button" href="{{#CHOneModel}}{{[link]}}{{/CHOneModel}}">{{#decisionOffers}}{{#attributes}}{{[Button Text]}}{{/attributes}}{{/decisionOffers}}</a>
        </p>
        <div class="bx__btn-close"></div>
    </div>
</div>
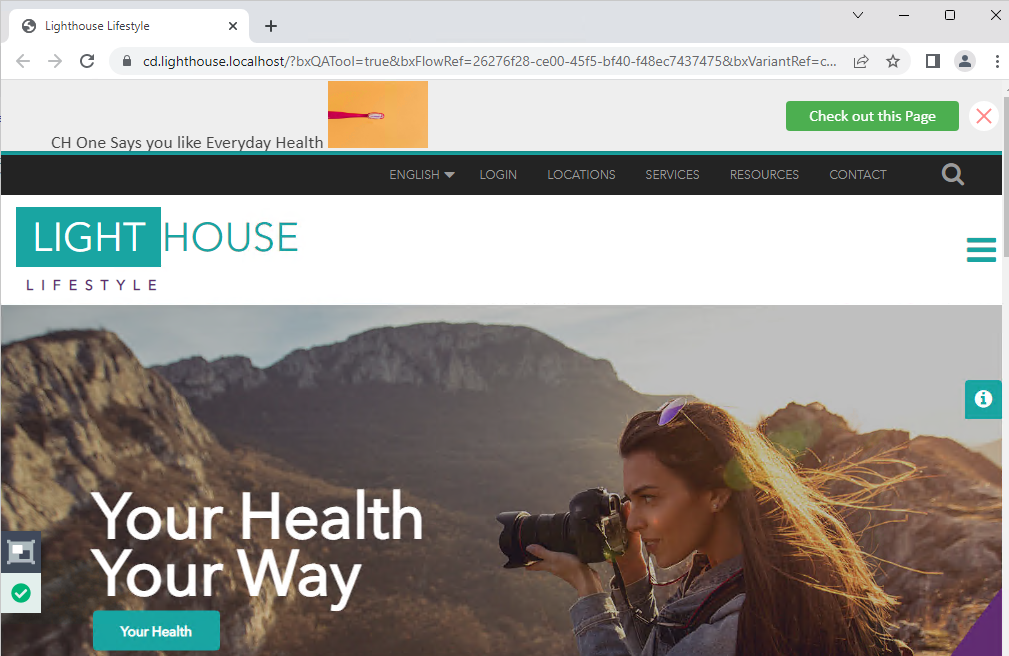
I replaced the Offer Title with the title coming from content hub one, added an image field and updated the CTA link to come from Content Hub One. I left the CTA button link attached to the offer template, which shows that you can mix offer content with external content as well as parameters in the experience itself.
With all that done, you can click the “Preview” button to preview the experience on your test site. And like that it works.
Wrapping Up
Using Content Hub One or another Content Management platform to manage your personalization variants can really help you manage your personalization strategy. Content Authors will not need to log into Sitecore personalize to change content but could instead manage them directly in the tools they are used to.
In the example with Content Hub one, I was able to change and publish content directly in Content Hub One and have the experience updated after a few minutes, without having to do anything in Sitecore Personalize.
This can be a powerful tool to help with your personalization journey. Looking to get started with yours? We’d love to help. Reach out to me on LinkedIn, Twitter or fill out our contact form.