
The benefits of composable are multiplied when you use products together. A while back, I showed you how you can leverage content in Content Hub One to drive experiences in Sitecore Personalize. This was a great example of that kind of value as it’s much easier to manage content variants in Content Hub One centrally as opposed to managing content across experiences, experiments, and offers within Sitecore Personalize. There is a lot of value in those efficiencies.
But in the end, someone still needs to come up with content for every experience. Another effective strategy could be to leverage the content you already have to search that content and surface relevant content recommendations. This can prove to be a low-effort but very effective way to introduce personalization. Although you could take this approach with multiple composable search solutions, Sitecore Search provides everything you need to provide personalized content recommendations to your Sitecore Personalize Experiences and Experiments.
Leveraging Sitecore Search
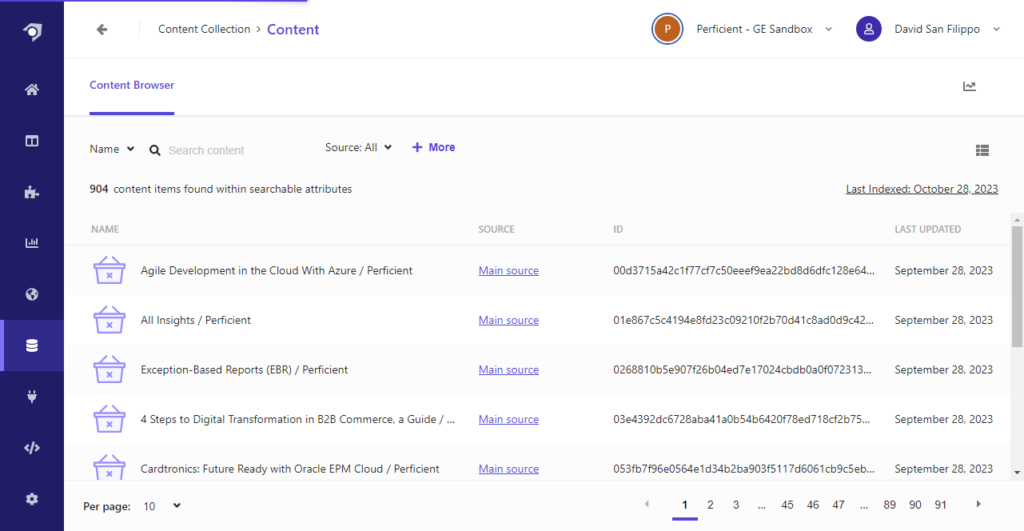
Sitecore Search is a robust content search platform from Sitecore. For more details about its full capabilities, Eric Sanner has written an in-depth series on getting to know Sitecore Search. To demonstrate how to leverage Sitecore Search with Sitecore Personalize, I used our sandbox, which was setup by Sitecore to crawl and Index all the content in Perficient.com. You can browse the content collection directly in the Sitecore Search console.
Selecting Items in Sitecore Search Console
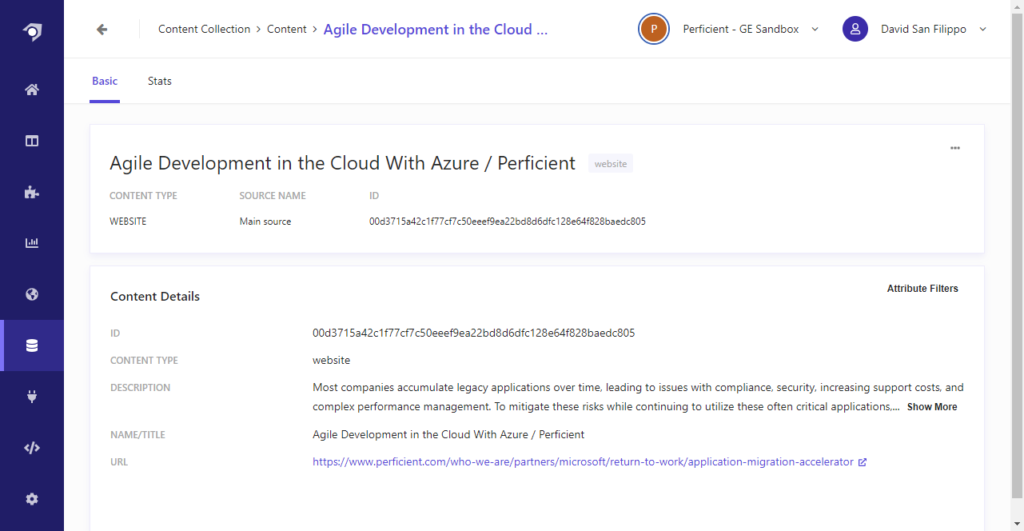
If you select an item, you will even see the details that are indexed. You can configure the crawler to extract content from the page which will give you even more flexibility in how you use that content to demonstrate search results. One change I would suggest would be to configure the crawler to ensure that every item has an image thumbnail url. This would allow us to use those images when creating an experience in Sitecore Personalize.
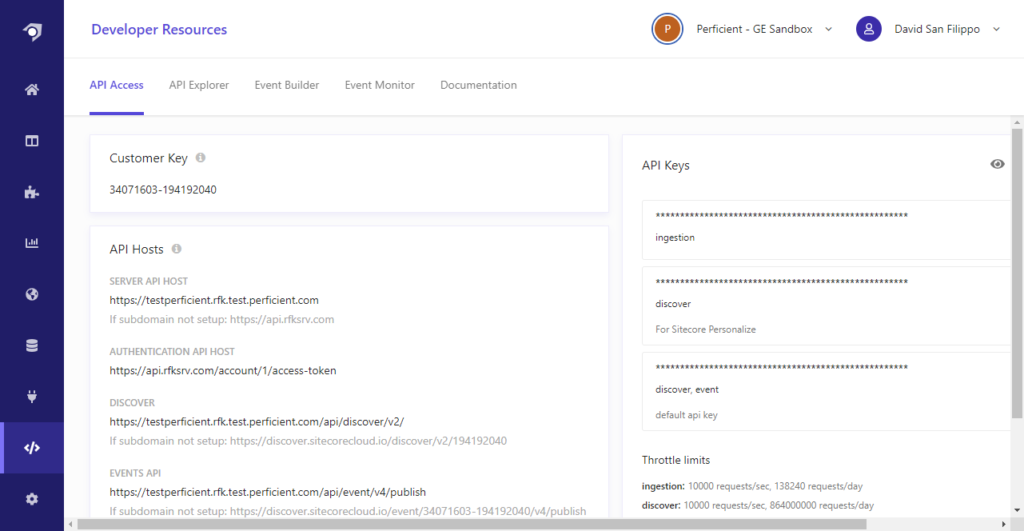
Before we try to use the Sitecore search API’s in Sitecore personalize, we need to get an API key from the Developer Resources section. Although you could use one that is pre-configured when your instance is created, I preferred to create a key just for Sitecore Personalize. This will need to be passed as a header. You’ll also need to note the API host urls to configure the connection later.
Features:
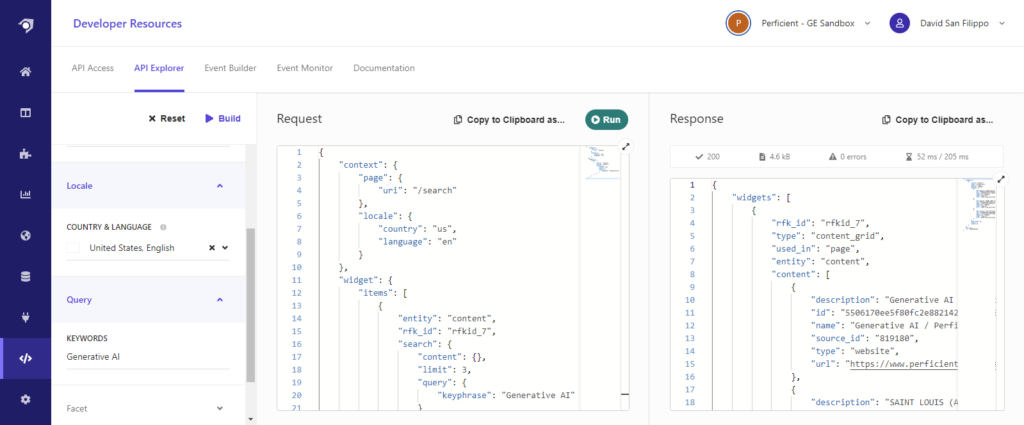
Another great feature is the API explorer tab in the Developer’s resource section. Here you can configure your search parameters and build the JSON request needed to run the search against your instance. This is the exact JSON you will need to configure in Sitecore Personalize, so use this to play with the parameters and filters you want to expose to get the results you are looking for. Once you do that, you can click “Build” to generate the JSON, and then click Run to see the responses.
Creating a Connection in Sitecore Personalize
Now that we have a handle on the search we want to use we can start to setup thing in Sitecore Personalize. In the Developer Center, Go to Connections. You will want to create a connection with a parameterized query for every query you want to run. As you can see, I ended up creating four different queries so far.
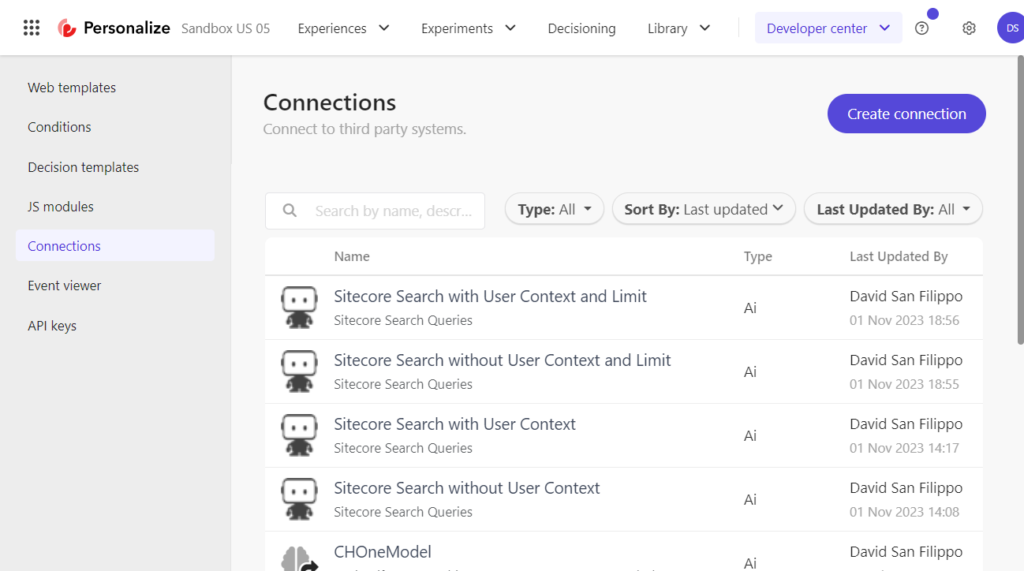
The first two I created without a filter parameters, so I was getting back the default 10 results. I wanted a smaller amount for the demo, so I created two connections with a limit parameter to allow me to configure how many results I wanted back.
The other parameter was the User ID. If I wanted general results, I would not want to specify it, but if I wanted personalized content recommendations for the search query, providing that users Sitecore Search UUID would allow the results to be customized. So I created additional connections with queries that included that parameter.
Note to do that properly, you would need to push the UUID used by your Sitecore Search user tracking to Sitecore Personalize through a custom data extension when raising an event.
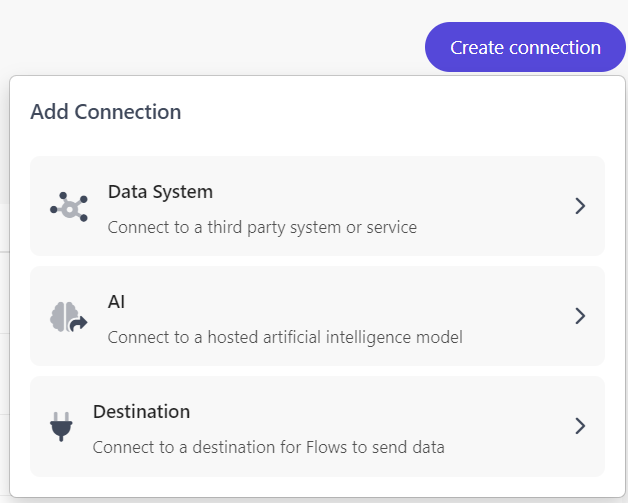
Creating an AI model
When you create the connection, create it as an AI model, as this allows you to define parameters in the request.
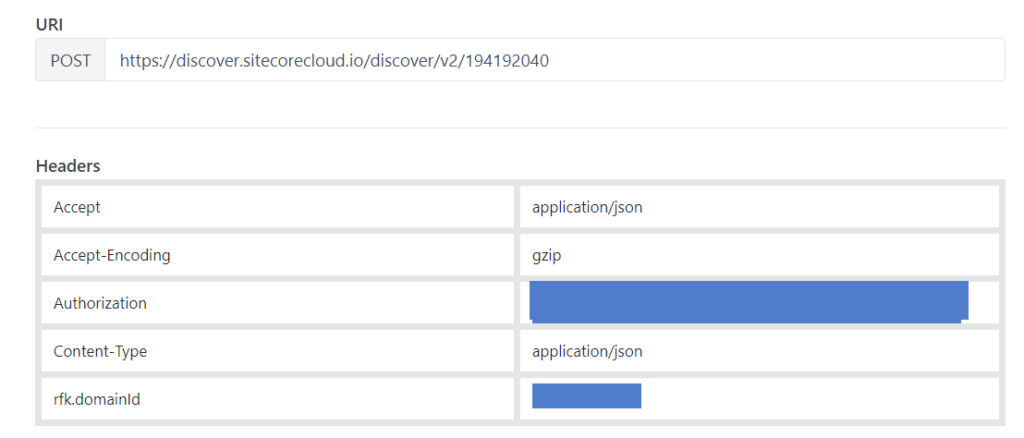
Give your connection a descriptive name, and then select “None” for authentication since you authenticate to the service using a custom “Authorization” header. This is the same key I mentioned in earlier. You will also need to add the domain Id, which is also available in the Sitecore search console.
Test Connection
Once you have that setup, you can configure the request. For that, just copy and paste the query you used in the API Explorer. Once you do that, you can take parts of the query and parameterize it by replacing it with a variable name wrapped in a dollar sign and brackets (${variable Name}).
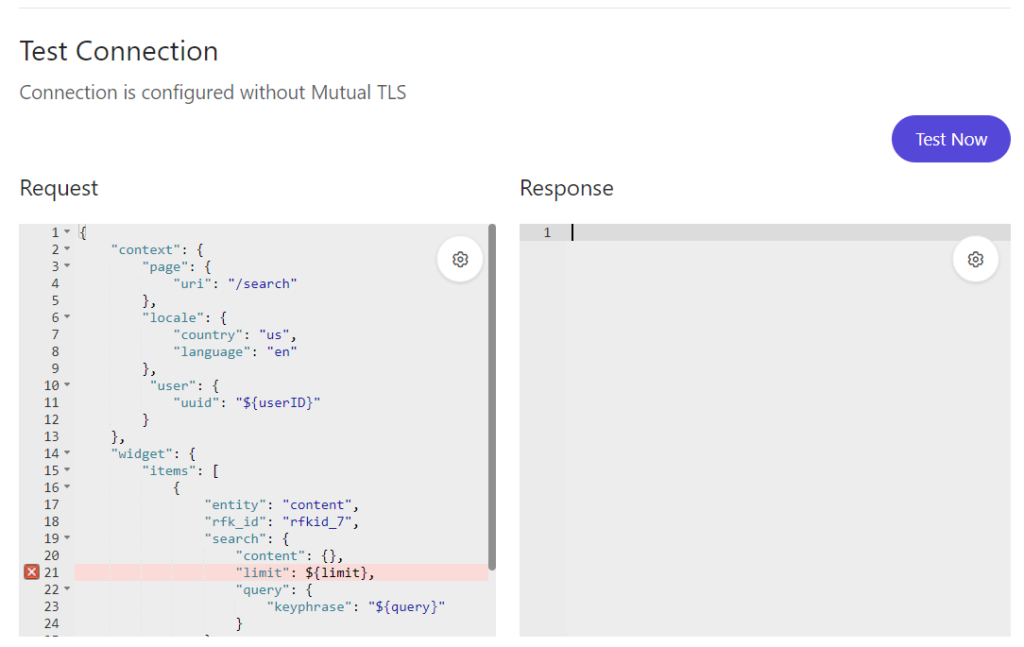
When you click “Test Now” you will be prompted for values to include in the test call.
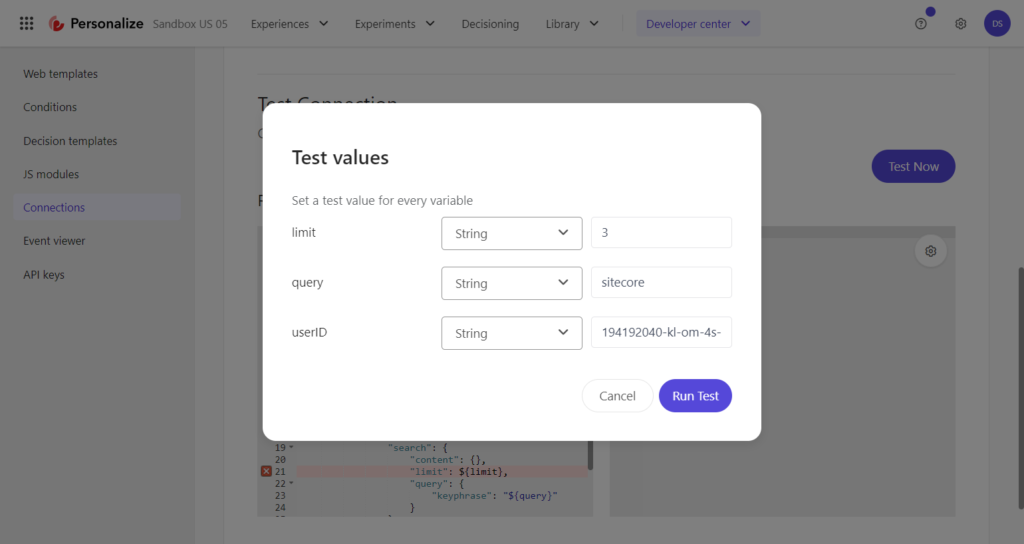
After clicking “Run Test” you should get results that include the same search results you saw in the API Explorer.

After you’ve validated that is setup properly, click next and Save your connection.
Building a Decision Model

Now that you’ve created your connection, you can use it in a decision model. The model will need to be configured to supply the inputs needed to call the connection. For demonstration purposes, I created a pretty simple model to just plug in a configurable query into the connection.
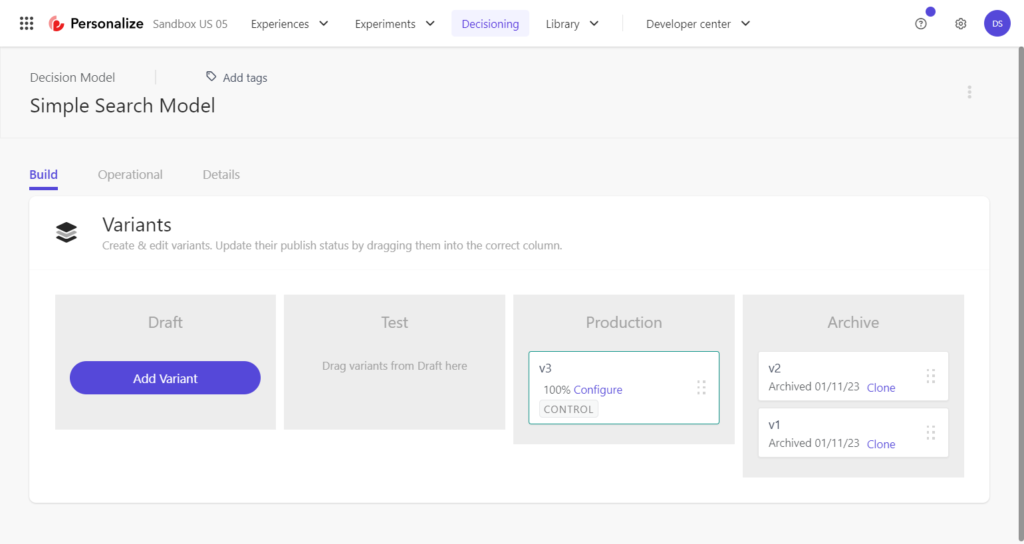
In my testing, I created multiple versions testing different queries and switching between the version of the connection that returned 10 results and the version that allowed me to configure a limit. When you are done with a model, you can drag it to “Production” to make it available. You can also AB test different models in case you want to target different queries, connection, or logic to see what performs better.
Model Examples
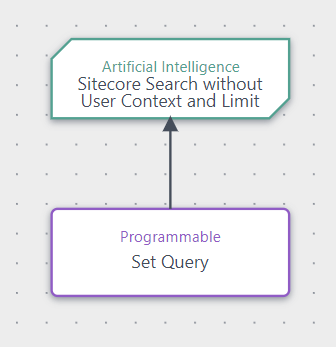
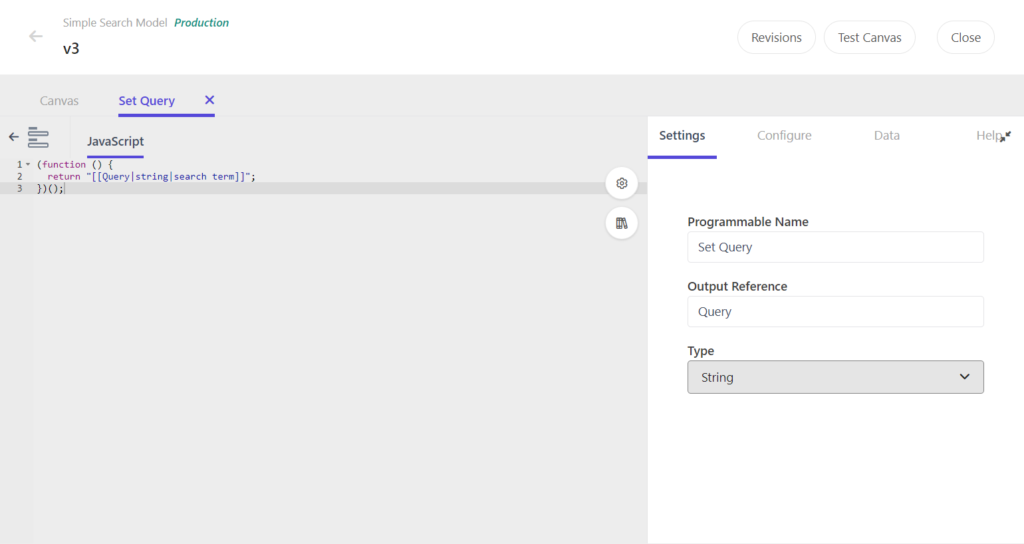
The model canvas in my example has two items, a Programmable to define the query term and the Connection to call Sitecore Search. I could envision a more complex canvas if we wanted to use different terms to search for based on what we knew about the visitor. This could incorporate a decision table to allow marketers to more easily configure it, or even my decision modelling tool to make the selection process easier to conceptualize.
I set up the programmable to use a marketer-friendly input, allowing them to type in the query they want to use.
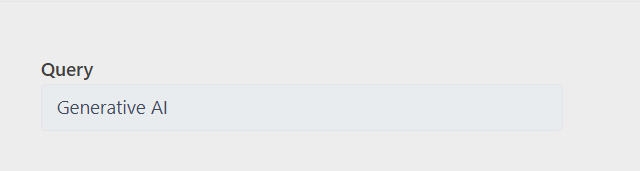
If you look at the “Advanced View” you’ll see it’s just a JavaScript function that returns the value of the input. I can envision a version of this that appends or prepends additional fixed search terms to whatever the marketer enters in this field to narrow the scope of the search.
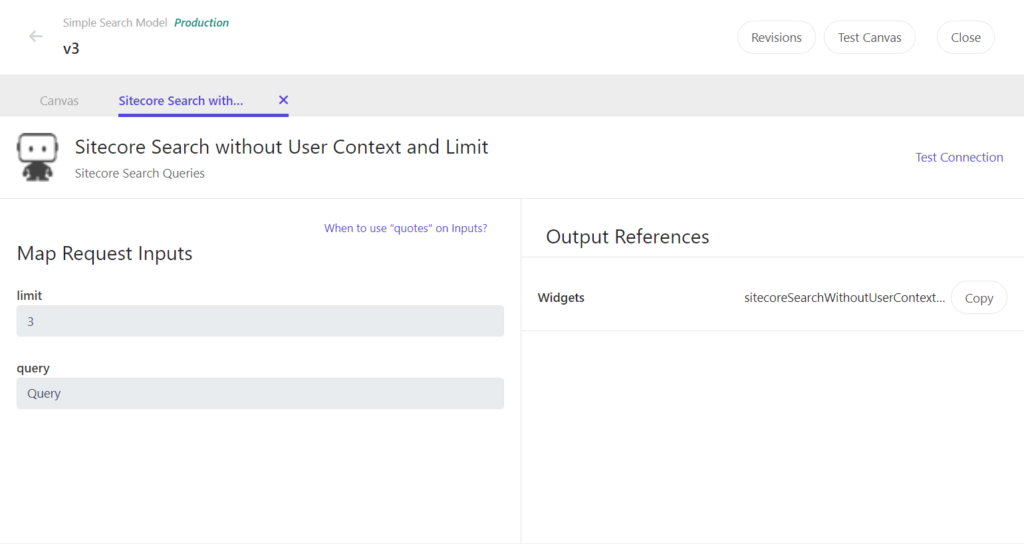
On the connection itself, you need to map the inputs we defined for the connection. In this example, I hard coded the limit to “3” and used the output of the Programmable to get the query term.
Test in Canvas
We can actually test the Canvas to validate that it calls the connection properly. Just specify a test user and click “Test Canvas” to see the results. Click on the “Full Response” tab and scroll down until you see the search results. If it’s there, it will be available to consume by any experience or experiment that uses this decision model.
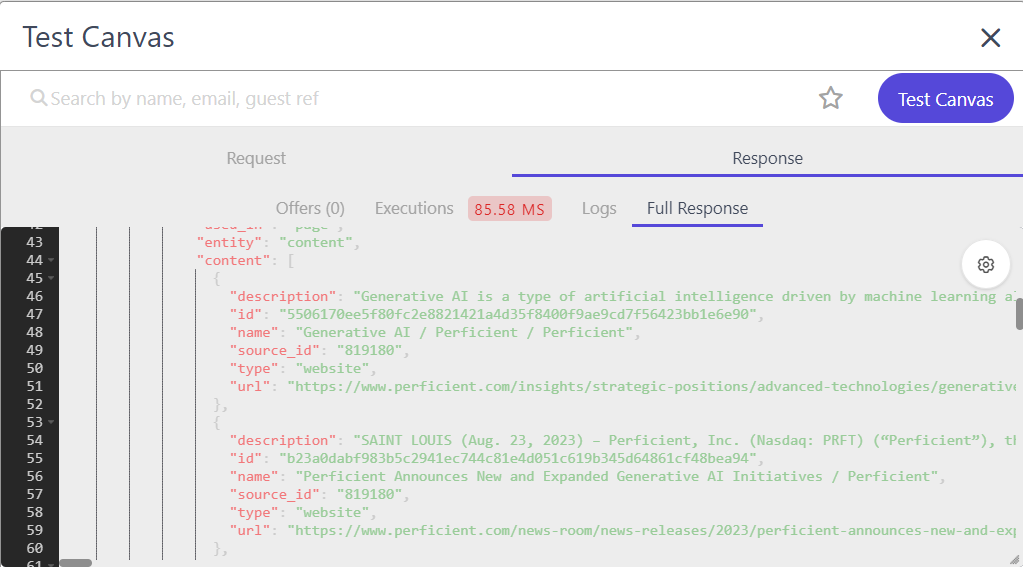
Note the “Execution time” is only 85ms. This must be as fast as possible, as this will be perceived as latency for our user experience. The faster it runs, the quicker the experience will show up on the page using this content.
Creating a Web Experience
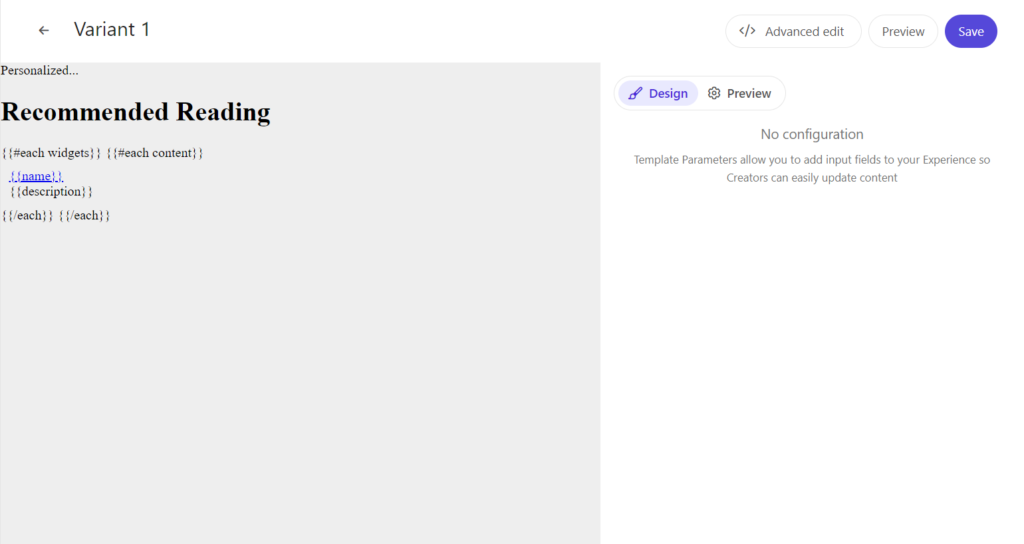
Now that we have a working decision mode, we want to create an experience to use the search results and display it to our visitors. I created a new experience and defined a variant with a custom template. When you open it, the preview is bland, as I did not specify any CSS rules but instead used the markup already used in my page template to style it after it is executed.
Advance Edit Example:
If you click on “Advanced Edit,” You’ll see the actual markup including used CSS classes. You’ll also note that I’m using Handlebar functions to enumerate through the search results, binding to a simple template with a link with the search result URL, the result name, and the description field. If I had indexed images, I could use them here as well.
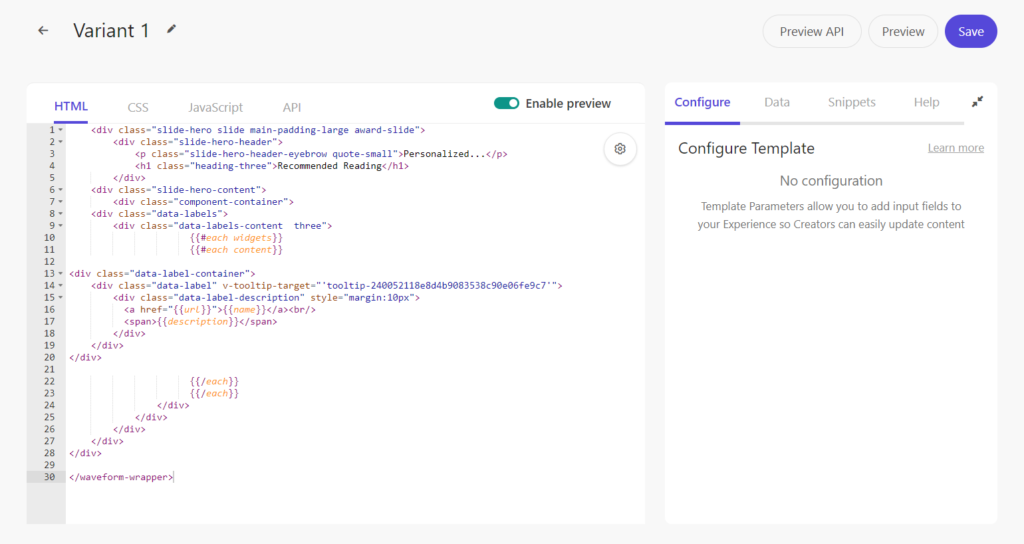
But note that this handlebar template is rendering on the client. For it to actually have access to those search results, we need to use Freemarker to render the outputs of our decision table into JSON. This API tab is executed server side, with access to everything from the model, but only what we render here is available to Handlebars on the client for binding.

Freemarker Assign Helper
This took some work to get right, but I’m using the freemarker Assign helper with the provided “getDecisionModelResultsNode” to get access to the Decision Model Output coming from the connection. I then use the freemarker list function to navigate to the output parameter take its contents and render it as JSON. You can click “Preview API” to validate that the results are what you want, and everything that shows up on the “Experience Response” tab is available on the client and can be used with Handlebars to bind to your HTML structure.
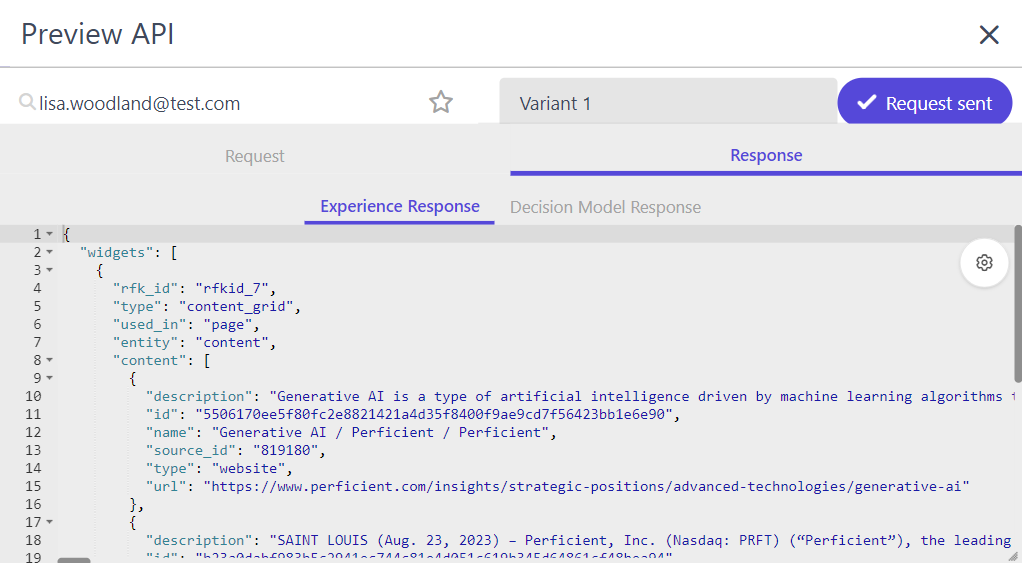
Once you’re happy with the Experience response and your HTML binding, you can preview the experience by clicking “Preview.” You’ll need to specify a url to open the experience and can even specify a test user to impersonate. Note that for this to work properly, it must be a site that is running with the “Engage SDK” library already set up. SSL is also required.
For testing, I used a scraper application to save Perficient.com to a local folder. I then created and installed a self-signed certificate and used the HTTP server command to run it locally. After I added a script with the Engage SDK and modified the home page to include that script. I also defined a custom div in the middle of the page to make it easier to target where my experience would show up.
Preview Experience:
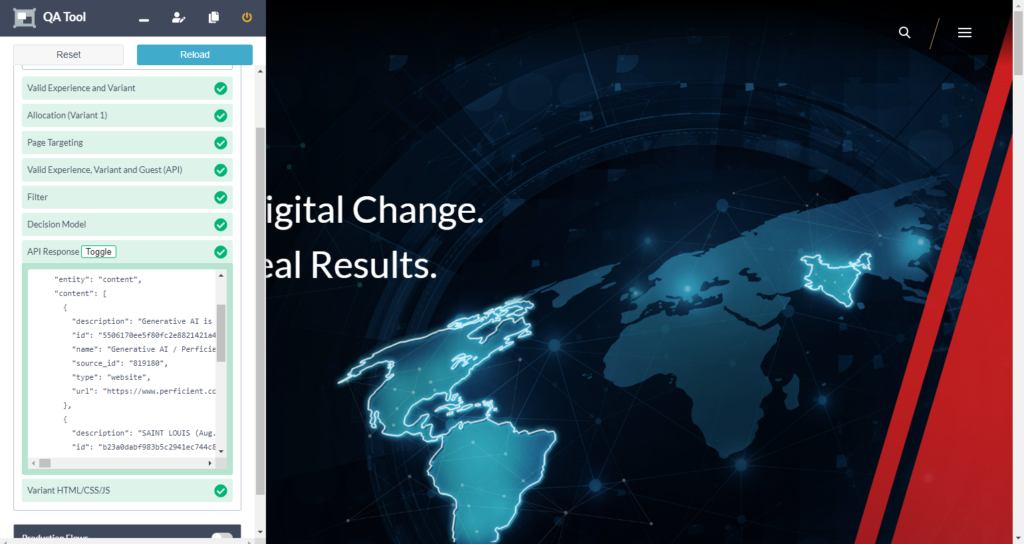
When you preview the experience, you will see a toolbar on the left. If everything is working properly, you’ll see a little green checkbox. If not, it will have a red ex and you can click to see what’s wrong. You can also expand it for more details.

This view also allows you to see the API response, which is what came out of the API tab from your freemarker templates. This is useful to make sure the right content is available for binding.
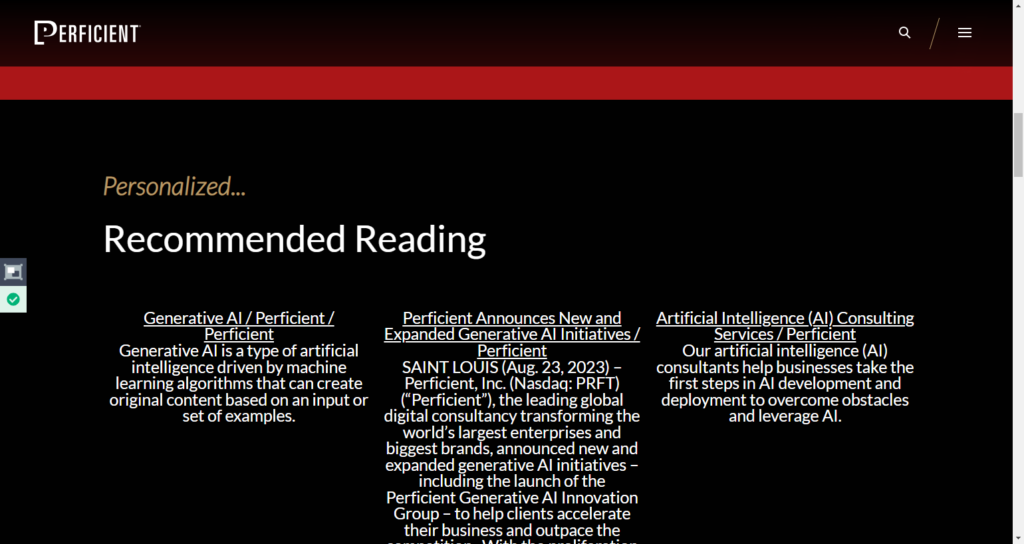
And if you scroll down on the page, you will see where the experience was injected into the page. Note the three Search Results. (Though I should probably either trim the middle article, so it is not so much longer than the others).
Other Potential Uses
This was just a basic use case. Having web templates that include images or a carousel could be a better experience. We could provide more results, or just the most relevant one. We could have filtered the results to a specific type of content. Maybe we only wanted to search for products, or news articles or even physicians.
I can also envision more complex decision models that really leverage everything we know about the visitor to run more relevant queries. We could use a more complex decision model to employ a “next best action” approach allowing us to associate specific search terms to specific actions or offers being used.
I would also include the user context in the queries to make sure Sitecore Search is personalizing the recommendations to the visitor. We would probably also want to make sure we are using the Sitecore search tracking APIs to let Sitecore search know what visitors are clicking on from the recommendations so it could make it even more relevant.
Don’t forget that you can leverage AB testing to validate the performance of different user experiences but also different queries. You can use this approach in Interactive and Triggered experiences as well, supply content recommendations and search results to your mobile apps and email campaign management tools for use in other channels.
There is also a lot more that can be done with Sitecore search, adding additional fields to bind to in the search results, and making the results even more relevant to visitors with boosting rules. This is an area that is very configurable and powerful.
Demo
I recorded a video walking through everything discussed in this article:
Wrapping Up.
Search is a powerful enabler for personalized experiences and can provide a low-effort way to create personalized content for your Sitecore Personalize experiences. Combining the powers of Sitecore Search and Sitecore Personalize, both components of XM Cloud Plus can make it very easy to create effective personalized experiences on your site.
Get started today and witness the transformation in your personalization efforts! Embrace the future of personalized customer journeys. Even if you are just considering Sitecore Personalize today, reach out to get a demo and see how powerful decisions could be for your business. You can get a hold of me on LinkedIn, or Twitter or fill out our contact form.