
Introduction
This guide will show you how to integrate Sitecore Content Delivery instance with Azure AD B2C using federated authentication. In this guide we will be using Sitecore 10.3 and a User Flow on Azure AD B2C side. Sitecore recognizes users visiting your website as extranet\anonymous and after introducing this feature, in form of sign up and sign in, you will be able to find out more about your users and therefore offer more customized digital experience. To find out more about benefits of such integration and whether you should do it, check out my blog post Sitecore and Azure AD B2C Integration
Before we get started
Since authentication follows certain protocols and specifications you should probably familiarize yourself with OAuth and OIDC (OpenID Connect) to better understand big picture when it comes to authenticating users.
Prerequisites
-
Setting up Azure AD B2C Tenant on Azure Portal
- Since there is a step-by-step instruction provided by Microsoft, I won’t be covering Tenant creation on Azure Portal. You can refer to this guide: https://learn.microsoft.com/en-us/azure/active-directory-b2c/tutorial-create-tenant
- If you already have Azure AD B2C Tenant, you can skip creation and use that one.
- NOTE: Do not mistake Azure AD (now Entra ID) for Azure AD B2C, those are two different things.
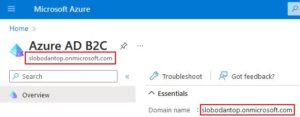
- Data you need to collect from this section for future reference is tenant name (or tenant domain). You can find this information in azure portal when you search for Azure AD B2C and open tenant management section. In my case that is slobodantop.onmicrosoft.com
-
Registering a Client Application under Azure AD B2C Tenant
- To register a Client Application you can refer to this guide: https://learn.microsoft.com/en-us/azure/active-directory-b2c/tutorial-register-applications?tabs=app-reg-ga
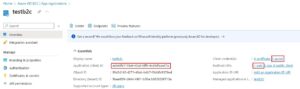
- After completing this you should have a Client Application set under your tenant App registration section in azure portal. This should be a Web application with proper RedirectUri, admin consent for openid and offline_access scopes, enabled Token Implicit Grant and valid client secret generated.
- Data you need to collect from your client application: Client Id, Client Secret, Redirect URI
-
Create User Flow
- Azure AD B2C offers you an option to use predefined policies called user flows for sign up, sign in, self-service password reset and profile update. For simplicity we will use just Sign Up & Sign In user flow. To create this user flow please refer to this guide: https://learn.microsoft.com/en-us/azure/active-directory-b2c/tutorial-create-user-flows?pivots=b2c-user-flow
- During creation you have an option to select user attributes which will be collected on sign up, and user claims which will be sent inside ID Token after successful authentication.
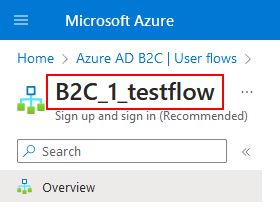
- Data you need to collect after completing this section is user flow name. In my case this is B2C_1_testflow
Implementing Azure AD B2C Identity Provider for Sitecore Federated Authentication
To successfully integrate your Sitecore content delivery instance and authenticate users on azure ad b2c using federated authentication you need to do the following:
Create configuration for identity provider
This is an example of a configuration file which has a purpose to:
- Hold our authentication settings
- Add identity provider under federated authentication section
- Set IdentityProvidersProcessor pipeline so it can be used by Sitecore
<?xml version="1.0" encoding="utf-8"?>
<configuration xmlns:patch="http://www.sitecore.net/xmlconfig/" xmlns:role="http://www.sitecore.net/xmlconfig/role/" xmlns:set="http://www.sitecore.net/xmlconfig/set/">
    <sitecore role:require="Standalone or ContentDelivery or ContentManagement">
        <settings>
            <setting name="Identity.AzureADB2C.ClientId" value="aeb68fe7-78a9-45a3-bff6-9c49dfeae67a"/>
            <setting name="Identity.AzureADB2C.ClientSecret" value="your-client-application-secret"/>
            <setting name="Identity.AzureADB2C.Authority" value="https://slobodantop.b2clogin.com/{0}/{1}"/>
            <setting name="Identity.AzureADB2C.TenantId" value="slobodantop.onmicrosoft.com"/>
            <setting name="Identity.AzureADB2C.CustomPolicyId" value="B2C_1_testflow"/>
            <setting name="Identity.AzureADB2C.TokenValidator" value="nonce"/>
            <setting name="Identity.AzureADB2C.ResponseType" value="code id_token"/>
            <setting name="Identity.AzureADB2C.Scope" value="openid offline_access"/>
            <setting name="Identity.AzureADB2C.RedirectUri" value="/auth-response"/>
            <setting name="Identity.AzureADB2C.HostName" value="https://aip.sc"/>
        </settings>
        <pipelines>
            <owin.identityProviders>
                <processor type="AuthIntegrationPlayground.Identity.IdentityProviders.AzureADB2CIdentityProvider, AuthIntegrationPlayground" resolve="true" />
            </owin.identityProviders>
        </pipelines>
        <federatedAuthentication type="Sitecore.Owin.Authentication.Configuration.FederatedAuthenticationConfiguration, Sitecore.Owin.Authentication">
            <identityProvidersPerSites hint="list:AddIdentityProvidersPerSites">
                <mapEntry name="aip" type="Sitecore.Owin.Authentication.Collections.IdentityProvidersPerSitesMapEntry, Sitecore.Owin.Authentication" resolve="true">
                    <sites hint="list">
                        <site>aip</site>
                    </sites>

                    <identityProviders hint="list:AddIdentityProvider">
                        <identityProvider ref="federatedAuthentication/identityProviders/identityProvider[@id='AzureADB2C']" />
                    </identityProviders>
                </mapEntry>
            </identityProvidersPerSites>

            <identityProviders hint="list:AddIdentityProvider">
                <identityProvider id="AzureADB2C" type="Sitecore.Owin.Authentication.Configuration.DefaultIdentityProvider, Sitecore.Owin.Authentication" >
                    <param desc="name">$(id)</param>
                    <param desc="domainManager" type="Sitecore.Abstractions.BaseDomainManager" resolve="true" />
                    <caption>Log in with Azure AD B2C</caption>
                    <icon>/assets/b2c.png</icon>
                    <domain>extranet</domain>
                    <enabled>true</enabled>
                </identityProvider>
            </identityProviders>
        </federatedAuthentication>
    </sitecore>
</configuration>

When it comes to identity provider configuration you need to aware of your Sitecore instance topology and add <sitecore role:require= attribute accordingly.
Create AzureADB2CIdentityProvider
The minimum which you need to implement for an authentication to work is:
- Create a class which inherits Sitecore.Owin.Authentication.Pipelines.IdentityProviders.IdentityProvidersProcessor
- Override Name property and ProcessCore method
- Set OpenIdConnectAuthenticationOptions and implement notification methods
using IdentityModel.Client;
using Microsoft.IdentityModel.Protocols.OpenIdConnect;
using Microsoft.IdentityModel.Tokens;
using Microsoft.Owin.Infrastructure;
using Microsoft.Owin.Security.Notifications;
using Microsoft.Owin.Security.OpenIdConnect;
using Owin;
using Sitecore.Abstractions;
using Sitecore.Diagnostics;
using Sitecore.Owin.Authentication.Configuration;
using Sitecore.Owin.Authentication.Extensions;
using Sitecore.Owin.Authentication.Pipelines.IdentityProviders;
using Sitecore.Owin.Authentication.Services;
using System;
using System.Threading.Tasks;

namespace AuthIntegrationPlayground.Identity.IdentityProviders
{
    public class AzureADB2CIdentityProvider : IdentityProvidersProcessor
    {
        protected override string IdentityProviderName => "AzureADB2C";

        // OAuth provider setting
        private string ClientId => Settings.GetSetting(Constants.AzureADB2CSettings.ClientId, "");
        private string ClientSecret => Settings.GetSetting(Constants.AzureADB2CSettings.ClientSecret, "");
        private string Authority => Settings.GetSetting(Constants.AzureADB2CSettings.Authority, "");
        private string TenantId => Settings.GetSetting(Constants.AzureADB2CSettings.TenantId, "");
        private string CustomPolicy => Settings.GetSetting(Constants.AzureADB2CSettings.CustomPolicyId, "");
        private string TokenValidator => Settings.GetSetting(Constants.AzureADB2CSettings.TokenValidator, "");
        private string ResponseType => Settings.GetSetting(Constants.AzureADB2CSettings.ResponseType, "");
        private string Scope => Settings.GetSetting(Constants.AzureADB2CSettings.Scope, "");
        private string RedirectUri => Settings.GetSetting(Constants.AzureADB2CSettings.RedirectUri, "");
        private string HostName => Settings.GetSetting(Constants.AzureADB2CSettings.HostName, "");

        private readonly string idToken = "id_token";
        private readonly string authErrorRelativePath = "/500-error";

        protected IdentityProvider IdentityProvider { get; set; }

        public AzureADB2CIdentityProvider(
            FederatedAuthenticationConfiguration federatedAuthenticationConfiguration,
            ICookieManager cookieManager,
            BaseSettings settings)
            : base(federatedAuthenticationConfiguration, cookieManager, settings)
        {
        }

        protected override void ProcessCore(IdentityProvidersArgs args)
        {
            try
            {
                Assert.ArgumentNotNull(args, nameof(args));

                var aadInstance = string.Format(this.Authority, this.TenantId, this.CustomPolicy);
                var metaAddress = $"{aadInstance}/v2.0/.well-known/openid-configuration";
                IdentityProvider = this.GetIdentityProvider();
                var authenticationType = this.GetAuthenticationType();

                var options = new OpenIdConnectAuthenticationOptions(authenticationType)
                {
                    Caption = IdentityProvider.Caption,
                    RedirectUri = string.Concat(this.HostName, this.RedirectUri),//https://aip.sc/auth-response url where authority will post back authorization code
                    ClientId = this.ClientId,// client application identifier
                    ResponseType = this.ResponseType,//code id_token this is what the authority will return after successful authentication
                    Authority = aadInstance,//https://slobodantop.b2clogin.com/slobodantop.onmicrosoft.com/B2C_1_signintest/v2.0 authority instance responsible to authenticate users
                    MetadataAddress = metaAddress,//https://slobodantop.b2clogin.com/slobodantop.onmicrosoft.com/B2C_1_signintest/v2.0/.well-known/openid-configuration holds authority configuration such as endpoint urls and authentication options supported. You can open this url in browser and examine the document
                    UseTokenLifetime = false, //indicates if we want authentication session lifetime(authentication cookie) to match lifetime of the token
                    ClientSecret = this.ClientSecret,// client application secret
                    TokenValidationParameters = new TokenValidationParameters { NameClaimType = this.TokenValidator },// in our case this is nonce
                    Scope = this.Scope,// openid offline_access are used per oidc specification. You can introduce any custom scopes if you want to have more granular authorization policies when it comes to protecting api resources. If you want to receive access token for specific scope in the response you will have to add 'token' to ResponseType.

                    Notifications = new OpenIdConnectAuthenticationNotifications
                    {
                        AuthenticationFailed = this.OnAuthenticationFailed,
                        AuthorizationCodeReceived = this.OnAuthorizationCodeReceived
                    }
                };

                args.App.UseOpenIdConnectAuthentication(options);
            }
            catch (Exception ex)
            {
                throw ex;
            }
        }

        private Task OnAuthenticationFailed(AuthenticationFailedNotification<OpenIdConnectMessage, OpenIdConnectAuthenticationOptions> notification)
        {
            if (notification.Exception != null)
            {
                Log.Info($"Azure AD B2C authentication failed with exception.\n {notification.Exception.Message}", this);

                notification.HandleResponse();

                // If you face IDX21323 error try adding CookieManager = new SystemWebCookieManager() inside OpenIdConnectAuthenticationOptions.
                // More info is available here https://github.com/aspnet/AspNetKatana/wiki/System.Web-response-cookie-integration-issues.
                // However, we keep this code to safeguard authentication. This fallback option will authenticate but it will lose returnUrl and user will be redirected to the home page.
                if (notification.Exception.Message.Contains("IDX21323"))
                {
                    notification.HandleResponse();
                    /* This line of code is the key to solve error
                   IDX21323: RequireNonce is '[PII is hidden]'. OpenIdConnectProtocolValidationContext.Nonce was null, OpenIdConnectProtocol.ValidatedIdToken.Payload.Nonce was not null.
                   The nonce cannot be validated. If you don't need to check the nonce, set OpenIdConnectProtocolValidator.RequireNonce to 'false'. Note if a 'nonce' is found it will be evaluated.
                   */
                    notification.OwinContext.Authentication.Challenge();
                    return Task.CompletedTask;
                }
            }

            notification.HandleResponse();
            notification.Response.Redirect(authErrorRelativePath);

            return Task.CompletedTask;
        }

        private async Task OnAuthorizationCodeReceived(AuthorizationCodeReceivedNotification notification)
        {
            // Exchange code for access and ID token
            var tokenClient = new TokenClient(string.Concat(notification.Options.Authority, "/oauth2/v2.0/token"), ClientId, ClientSecret);
            var tokenResponse = await tokenClient.RequestAuthorizationCodeAsync(notification.Code, notification.RedirectUri);
            if (tokenResponse.IsError)
            {
                HandleAuthorizationError(notification);
                return;
            }

            notification.AuthenticationTicket.Identity.ApplyClaimsTransformations(new TransformationContext(this.FederatedAuthenticationConfiguration, this.IdentityProvider));
        }

        private void HandleAuthorizationError(AuthorizationCodeReceivedNotification notification)
        {
            // Log Error
            notification.HandleResponse();
            notification.Response.Redirect(authErrorRelativePath);
        }
    }
}
Generate valid authentication request
To initiate authentication against identity provider using Sitecore federated authentication you need two things.
- Generate Sign In Url using GetSignInUrlInfoPipeline
This is usually placed inside the controller which is then used by a custom rendering responsible for authenticating users. This pipeline accepts argument called returnUrl which is used to redirect user after successful authentication. Typically user ends up on the same page where authentication initially started.using AuthIntegrationPlayground.Models; using Sitecore.Abstractions; using Sitecore.Diagnostics; using Sitecore.Mvc.Controllers; using Sitecore.Pipelines.GetSignInUrlInfo; using System; using System.Collections.Generic; using System.Linq; using System.Security.Claims; using System.Web.Mvc; namespace AuthIntegrationPlayground.Controllers { public class AuthController : SitecoreController { private readonly BaseCorePipelineManager _corePipelineManager; private const string IdentityProviderName = "AzureADB2C"; public AuthController(BaseCorePipelineManager corePipelineManager) { Assert.ArgumentNotNull(corePipelineManager, nameof(corePipelineManager)); _corePipelineManager = corePipelineManager; } public ActionResult AzureADB2CLogin() { var user = Sitecore.Security.Accounts.User.Current; var profile = user.Profile; var model = new LoginModel(); if (!Sitecore.Context.PageMode.IsExperienceEditor && !Sitecore.Context.PageMode.IsExperienceEditorEditing) { if (!profile.IsAnonymous) { var userIdentity = (ClaimsIdentity)profile.ProfileUser.Identity; var claims = userIdentity.Claims.Select(claim => $"{claim.Type} : {claim.Value}"); model.UserClaims.AddRange(claims); } else { // generate sign in url with valid returnUrl var site = Sitecore.Sites.SiteContext.Current.Name; var returnUrl = System.Web.HttpContext.Current.Request.RawUrl; var args = new GetSignInUrlInfoArgs(site: site, returnUrl: returnUrl ?? "/"); GetSignInUrlInfoPipeline.Run(_corePipelineManager, args); var urlInfo = args.Result.FirstOrDefault(x => x.IdentityProvider == IdentityProviderName); var signInUrl = urlInfo?.Href; model.SignInUrl = signInUrl; } } return View("~/Views/Auth/Login.cshtml", model); } } } - Use generated sign in url as a POST request which will start authentication process.
Easiest ways of achieving this is to create and submit form on the frontend when user click on custom login rendering.
This is an example .cshtml view for custom login rendering@model AuthIntegrationPlayground.Models.LoginModel <div class="login-button-wrapper"> <button class="login-button" onclick="signInClick('@Model.SignInUrl')">Sign In</button> @if(Model.UserClaims.Any()) { <div>Claims</div> foreach (var claim in Model.UserClaims) { <div>@claim</div> } } </div> <script type="text/javascript"> function signInClick(signInUrl) { var formAuth = document.createElement("form"); formAuth.method = "POST"; formAuth.action = signInUrl; document.body.appendChild(formAuth); formAuth.submit(); } </script>
Testing Sitecore Federated Authentication
- Place your custom authentication rendering on a page. Typically it is part of the header, but for simplicity I am just placing it on a page where it can be clicked to start authentication
- Click on Sign In button to start authentication process. You should be redirected to Azure AD B2C sign in page
- If you have an account you can simply sign in using your credentials. If you don’t have an account you can use sign up option to create one. After completing sign up flow you will be signed in
- After returning to Sitecore page after successful authentication rendering displays user claims from azure ad b2c
This is how the complete flow looks like.
Summary
In this blog I have covered the quickest and easiest way to integrate Sitecore and Azure AD B2C. This covers prerequisites you need on Azure AD B2C side, configuration and implementation for azure ad b2c identity provider in Sitecore and basic custom rendering to start authentication process.
This is a good starting point which can be used to further extend and customize your authentication. In some cases this will be sufficient to match client’s requirements. Since we can’t change how user flow is operating internally, any custom user sign up and sign in journey should be implemented using Azure AD B2C Custom policies.
Here are some steps we can take after initial integration:
- Create custom user builder which will make sure user is created in a way that matches our needs
- Use claim transformations to map Azure AD B2C claim names and values to more friendly named claims
- Create OWIN user extension to make claims easily accessible
- Add custom claims to collect additional user data
- Use custom page content for our user flow so we can change the appearance of sign in page
Sitecore federated authentication additional resources
Here is a list of links where you can find more information relevant to authentication protocols, azure ad b2c and Sitecore federated authentication.