
Deployment of Spring Boot App
This is a common use case scenario that is used by several organizations. I hope this detailed blog is helpful to understand the CI/CD process.
Let’s get started and dig deeper into each of these steps.
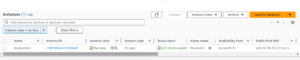
Step 1 — Create an Ubuntu T3 Large Instance
Step 2 — Install JDK
sudo su
sudo apt-get update
sudo apt install openjdk-11-jdk -y
java --version

Step 3 — Install and Setup Jenkins
curl -fsSL https://pkg.jenkins.io/debian-stable/jenkins.io.key | sudo tee /usr/share/keyrings/jenkins-keyring.asc > /dev/null

echo deb [signed-by=/usr/share/keyrings/jenkins-keyring.asc] https://pkg.jenkins.io/debian-stable binary/ | sudo tee /etc/apt/sources.list.d/jenkins.list > /dev/null

sudo apt update
sudo apt install jenkins
sudo systemctl status jenkins
Below attached Image for the normal procedure to install Jenkins.
but I have faced some issues.
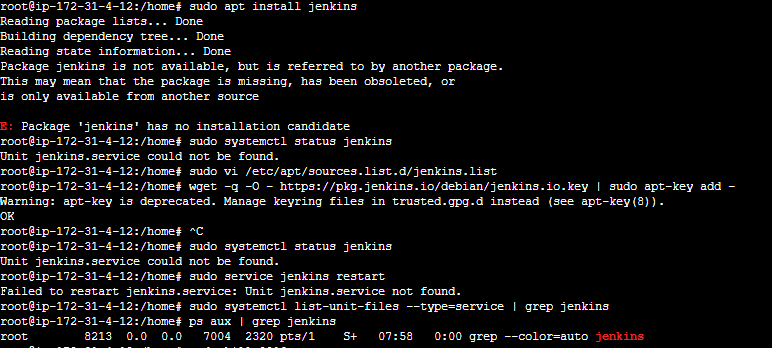
While installing Jenkins faced some issues after some debugging methods found the proper link and installation :
Debian Jenkins Packages use this link to install Jenkins on the Ubuntu server.
steps to follow:
This is the Debian package repository of Jenkins to automate installation and upgrade. To use this repository, first add the key to your system:


  curl -fsSL https://pkg.jenkins.io/debian-stable/jenkins.io-2023.key | sudo tee \
    /usr/share/keyrings/jenkins-keyring.asc > /dev/null

Then add a Jenkins apt repository entry:

  echo deb [signed-by=/usr/share/keyrings/jenkins-keyring.asc] \
    https://pkg.jenkins.io/debian-stable binary/ | sudo tee \
    /etc/apt/sources.list.d/jenkins.list > /dev/null

Update your local package index, then finally install Jenkins:


  sudo apt-get update
  sudo apt-get install fontconfig openjdk-11-jre
  sudo apt-get install jenkins
Since Jenkins works on Port 8080, we will need to go to our EC2 Security Group and add Port 8080 in our Inbound Security Rules.
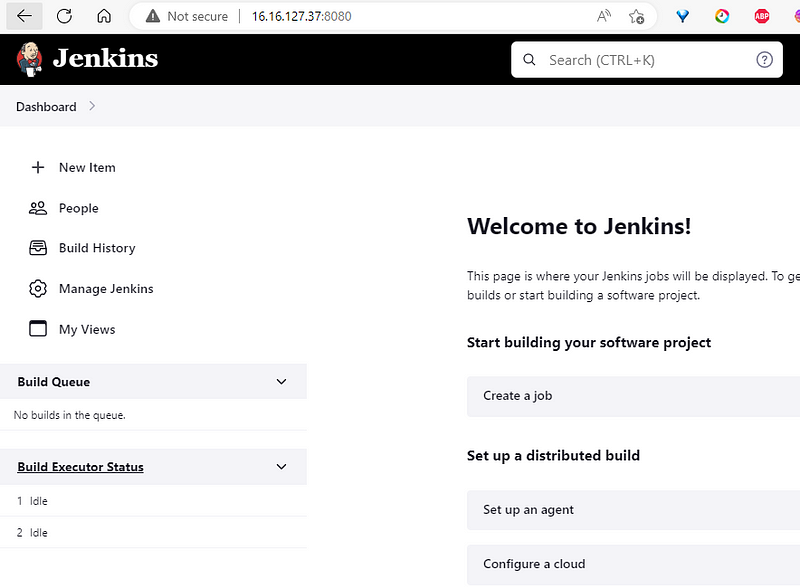
Next, go to your <Public IP Address:8080> to access Jenkins
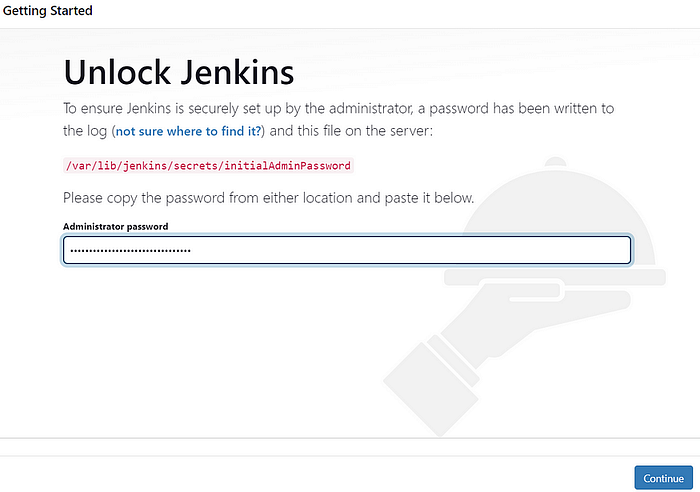
To get the initial admin password on Jenkins
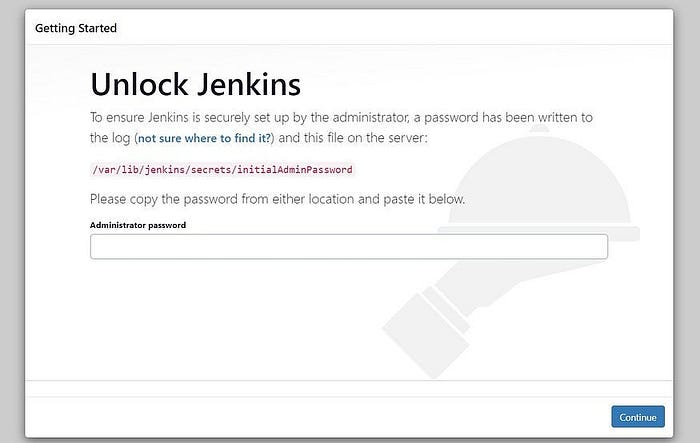
sudo cat /var/lib/jenkins/secrets/initialAdminPassword
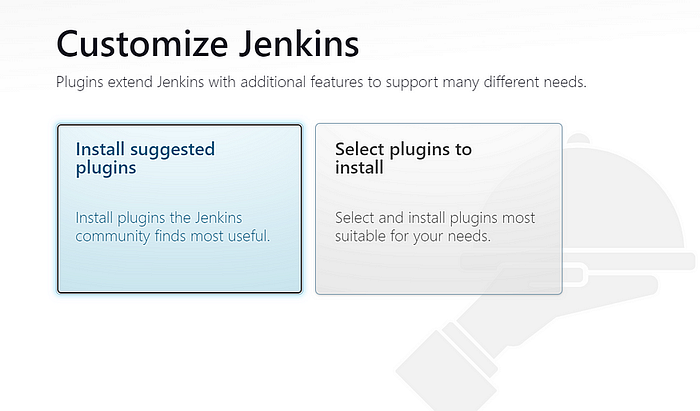

Jenkins is set up successfully now.

Step 4 — Update Visudo and Assign Administrative Privileges to Jenkins User
Let’s add jenkins user as an administrator and also ass NOPASSWD so that during the pipeline run it will not ask for root password.
So, basically sudoers file is needed to make any user admin.
Open the file /etc/sudoers in vi mode
sudo vi /etc/sudoers
Add the following line at the end of the file:
jenkins ALL=(ALL) NOPASSWD: ALL
After adding the line save and quit the file with: wq!

Now we can use Jenkins as the root user and for that run the following command:
$ sudo su - jenkins

Step 5 — Install Docker with user Jenkins
Remember, all these commands are run as a Jenkins user, not a Ubuntu user.
sudo apt install docker.io
docker --version


docker ps


sudo usermod -aG docker jenkins
sudo docker ps
sudo reboot
sudo usermod -aG docker jenkins
sudo docker ps
sudo reboot
Step 6 — Install and Setup AWS and EKS CLI
sudo apt install awscli
curl "https://awscli.amazonaws.com/awscli-exe-linux-x86_64.zip" -o "awscliv2.zip"
sudo apt install unzip
unzip awscliv2.zip
sudo ./aws/install --update
aws --version

Now after installing AWS CLI, let’s configure the AWS CLI so that it can authenticate and communicate with the AWS environment.
aws configure
Login to your AWS Console, go to Security Credentials and create a new Secret access key. Remember, to download this key, as you will not be able to access it later if you haven’t downloaded it. Enter all these details:

Step 7 — Install and Setup kubectl
curl -LO "https://dl.k8s.io/release/$(curl -L -s https://dl.k8s.io/release/stable.txt)/bin/linux/amd64/kubectl"
chmod +x ./kubectl
sudo mv ./kubectl /usr/local/bin
kubectl version

Step 8 — Creating an Amazon EKS Cluster using eksctl
First, we have to install and set up eksctl using these commands.
curl --silent --location "https://github.com/weaveworks/eksctl/releases/latest/download/eksctl_$(uname -s)_amd64.tar.gz" | tar xz -C /tmp
sudo mv /tmp/eksctl /usr/local/bin
eksctl version

You can refer to this URL to create an Amazon EKS Cluster. https://docs.aws.amazon.com/eks/latest/userguide/create-cluster.html .
Here I have created a cluster using eksctl.
You need the following in order to run the eksctl command:
- Name of the cluster: — name first-eks-cluster1
- Version of Kubernetes: — version 1.24
- Region : — region us-east-2
- Nodegroup name/worker nodes: — nodegroup-name worker-nodes
- Node Type: — nodegroup-type t2.micro
- Number of nodes: — nodes 2
This command will set up the EKS Cluster in our EC2 Instance. The command for the same is as below,
eksctl create cluster --name new-eks-cluster --version 1.24 --region us-east-2 --nodegroup-name worker-nodes --node-type t2.micro --nodes 2
Kindly note that it took me almost 20–25 minutes to get this installed and running.


Step 9 — Add the EKS IAM Role to EC2
Here, first, we will need to create an IAM Role with administrator access.
You need to create an IAM role with the AdministratorAccess policy.
Go to the AWS console, IAM, and click on Roles. create a role

Select AWS services, Click EC2, and Click on Next permissions.

Now search for AdministratorAccess policy and click
Skip on create tag.
Now give a role name and create it.
Assign the role to the EC2 instance
Go to the AWS console, click on EC2, select EC2 instance, and Choose Security.
Click on Modify IAM Role
Choose the role you have created from the dropdown.
Select the role and click on Apply.

Step 10 — Add Docker Credentials on Jenkins
Goto -> Jenkins -> Manage Jenkins -> Manage Credentials -> Stored scoped to jenkins -> global -> Add Credentials [ GIVE YOUR DOCKER HUB CREDENTIALS ]
Next, we will create GitHub credentials:
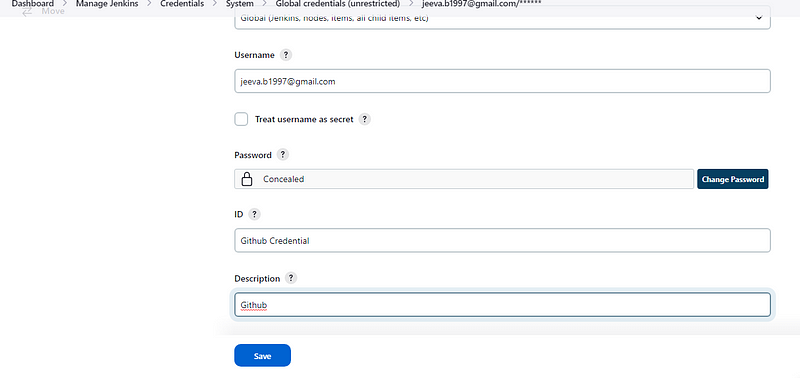
The Global Credentials Dashboard should look like this:

Step 11 — Add Maven in Global Tool Configuration

Step 12 — Add Jenkins Shared Library
Go to Manage Jenkins → Configure System → Global Pipeline Libraries →


Library name — jenkins-shared-library
Default Version — main
Project Repository — https://github.com/jeeva0406/jenkins-shared-library1.git
Click on Apply and Save
Step 13 — Build, Deploy, and Test Jenkins Pipeline
Create a new Pipeline: Go to Jenkins Dashboard
click on New Item Pipeline Name: EKS-Demo-Pipeline
select Pipeline Add pipeline script
Add the below script
@Library('jenkins-shared-library@main') _
pipeline {

  agent any

  parameters {
 choice(name: 'action', choices: 'create\nrollback', description: 'Create/rollback of the deployment')
    string(name: 'ImageName', description: "Name of the docker build", defaultValue: "kubernetes-configmap-reload")
 string(name: 'ImageTag', description: "Name of the docker build",defaultValue: "v1")
 string(name: 'AppName', description: "Name of the Application",defaultValue: "kubernetes-configmap-reload")
    string(name: 'docker_repo', description: "Name of docker repository",defaultValue: "writetoritika")
  }

  tools{
        maven 'maven3'
    }
    stages {
        stage('Git-Checkout') {
            when {
    expression { params.action == 'create' }
   }
            steps {
                gitCheckout(
                    branch: "main",
                    url: "https://github.com/writetoritika/spring-cloud-kubernetes.git"
                )
            }
        }
        stage('Build-Maven'){
            when {
    expression { params.action == 'create' }
   }
      steps {
          dir("${params.AppName}") {
           sh 'mvn clean package'
          }
      }
     }
     stage("DockerBuild and Push") {
         when {
    expression { params.action == 'create' }
   }
         steps {
             dir("${params.AppName}") {
                 dockerBuild ( "${params.ImageName}", "${params.docker_repo}" )
             }
         }
     }
     stage("Docker-CleanUP") {
         when {
    expression { params.action == 'create' }
   }
         steps {
             dockerCleanup ( "${params.ImageName}", "${params.docker_repo}" )
   }
  }
       stage("Ansible Setup") {
         when {
    expression { params.action == 'create' }
   }
         steps {
             sh 'ansible-playbook ${WORKSPACE}/kubernetes-configmap-reload/server_setup.yml'
   }
  }
     stage("Create deployment") {
   when {
    expression { params.action == 'create' }
   }
         steps {
             sh 'echo ${WORKSPACE}'
             sh 'kubectl create -f ${WORKSPACE}/kubernetes-configmap-reload/kubernetes-configmap.yml'
         }
     }
     stage ("wait_for_pods"){
     steps{

                sh 'sleep 300'

     }
     }
  stage("rollback deployment") {
         steps {
               sh """
                    kubectl delete deploy ${params.AppName}
         kubectl delete svc ${params.AppName}
      """
         }
     }
    }
}
Step 14 — Ansible Python Setup
Lets goto our EC2 Instance, and enter these commands
sudo apt update
sudo apt install software-properties-common
sudo add-apt-repository --yes --update ppa:ansible/ansible
sudo apt install ansible
sudo apt install python3
sudo apt install python3-pip
pip3 install Kubernetes
Finally, after many failed attempts our pipeline is running:

Step 15 — Add Webhook for Continuous Delivery
Go to your GitHub Project, Settings → webhooks →<EC2IP Address:8080>/github-webhook/ and make the content type to application/json

Lastly, we need to trigger with Webhook
IN JENKINS -> GO TO GENERAL TAB -> BUILD TRIGGERS -> ADD GITHUB WEB HOOK TRIGGER

Now,
Step 16 — Delete Cluster
Lastly, use this command:
eksctl delete cluster --name new-eks-cluster
Keep learning!