
Step 1: Creating a Form Handler in Salesforce Pardot
Mapping Form Fields: Ensuring successful integration involves mapping Sitecore form fields to their corresponding counterparts in Salesforce Pardot. This step is crucial for maintaining data consistency and accuracy during transmission.
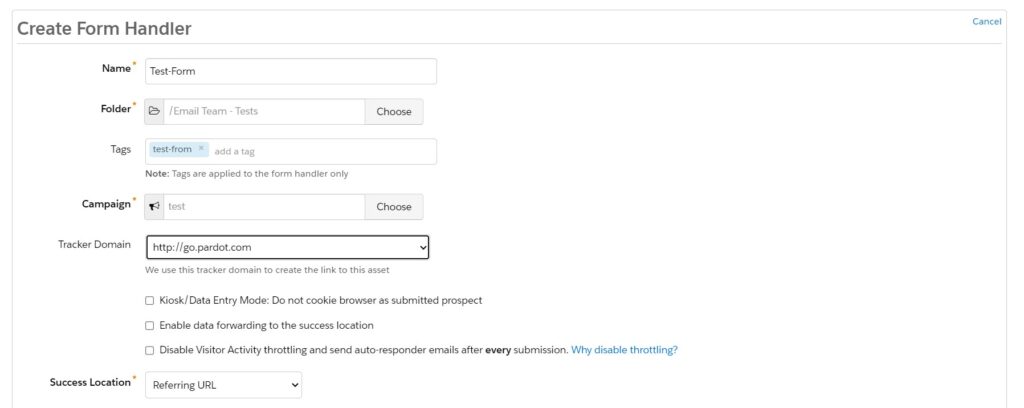
To create a form handler in Salesforce Pardot, navigate to the Form Handlers section on the dashboard and click the “Add Form Handler” button.

Fill in all the required details in the form.
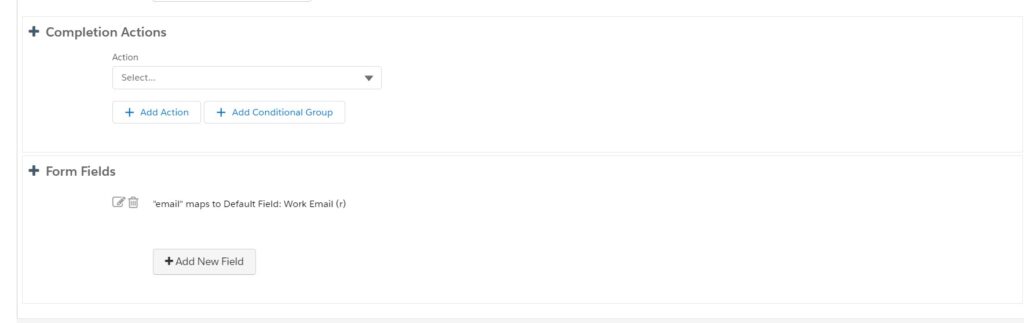
Scrolling down, you will find the Form Fields section, where the email field is visible by default. To add a new field, click on the “Add New Field” button.
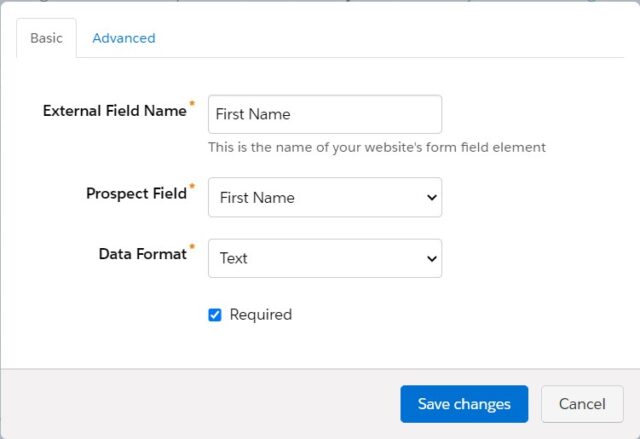
Upon clicking the “Add New Field” button, a popup will appear where you can enter the field name, prospect, and data format.
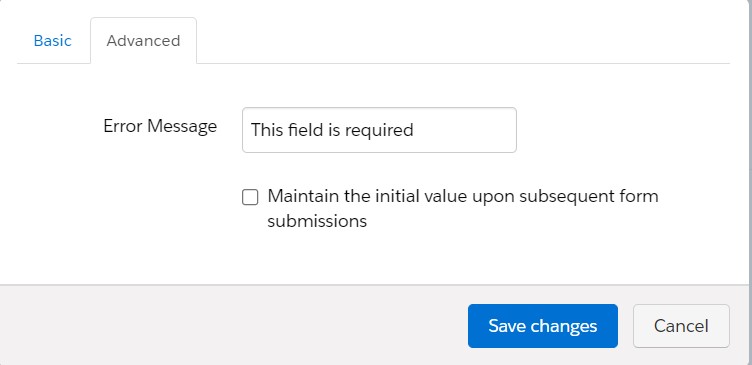
In this popup, there is also an Advanced tab. Click on it if you want to set a custom message for validation failure.
After adding all the required fields, click on the “Create Form Handler” button. You will then see details of the form handler along with the added fields.
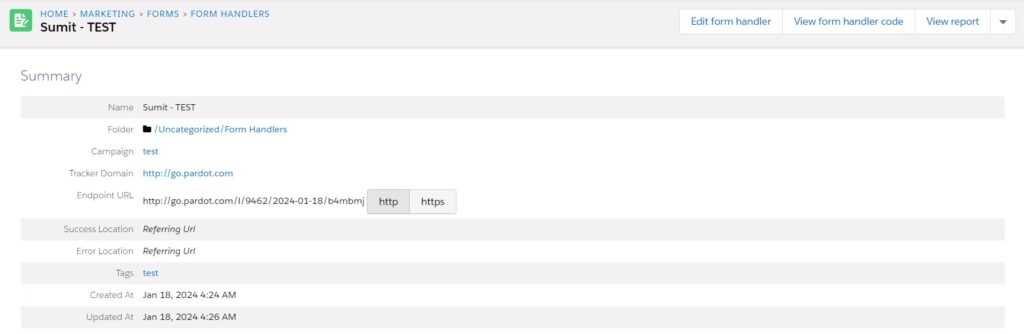
Note: The fields you have added must match exactly with the Sitecore form; the names of the fields should be an exact match.
Step 2: Implementing the Code Pipeline in C#
This section delves into the intricacies of establishing a robust code pipeline to handle form submissions. It covers seamless integration with Sitecore APIs, data transformations, and validation processes critical for successful implementation.

Open your project code in Visual Studio and select the project where you want to create the pipeline for this custom action. In my case, I’ve created a separate feature project for this implementation, as I plan to integrate other tools from Pardot.
In my GitHub repository, I’ve added three files:
- PardotParameters.cs: This file contains the EndpointUrl parameter, which we can set in Sitecore. This URL is provided by Pardot on their dashboard.
- PardotEndpointViewModel.cs: In this file, we override the property to obtain the Pardot Endpoint from Sitecore.
- SubmitToPardot.cs: Here, you can find the logic through which we retrieve the Pardot endpoint, submit form data, and then submit it to Pardot.
These files collectively form the foundation for implementing the code pipeline, allowing smooth interaction with Pardot in handling form submissions.
Step 3: Creating a Custom Submit Action in Sitecore
To initiate the integration, the first step involves crafting a custom submit action within the Sitecore platform. This action is a pivotal link between Sitecore forms and the subsequent data transmission to Salesforce Pardot.
To create a custom submit action for Sitecore forms, follow these steps:
- Navigate to the following path in your Sitecore tree:/sitecore/system/Settings/Forms/Submit Actions
- Create an item using the template located at: /sitecore/templates/System/Forms/Submit Action
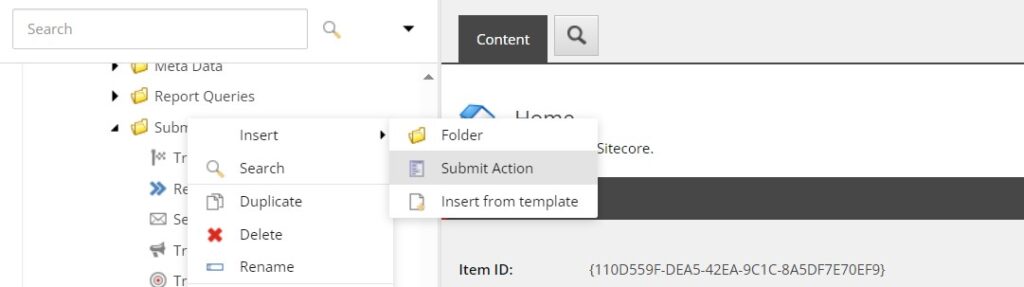
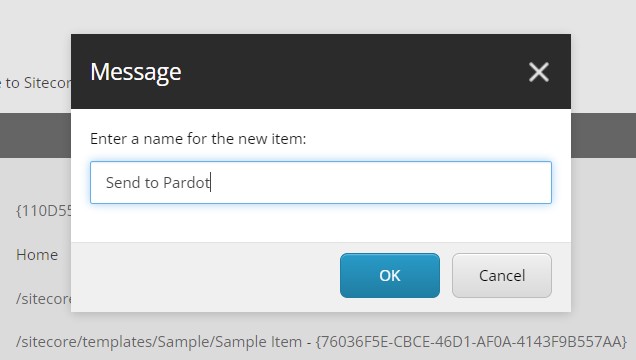
- Add the name of the submit action; for example, I’ve used “Save to Pardot”
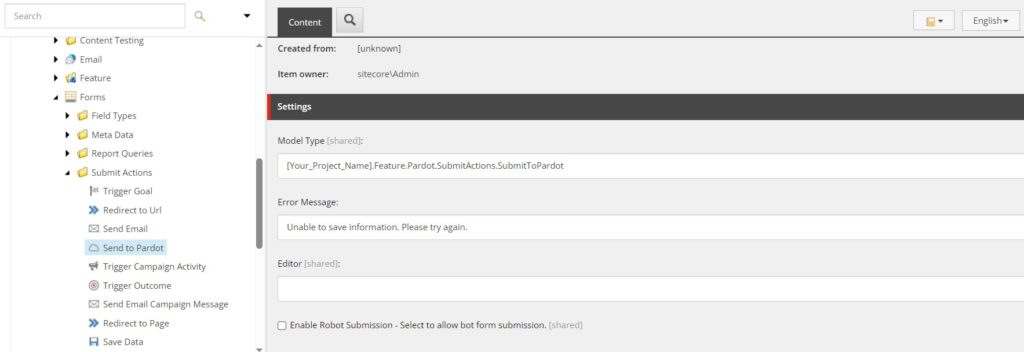
- Once you’ve created the custom submit action item, you’ll find four fields: Model Type, Error Message, Editor, and Enable Robot Submission.
- In the Model Type field, typically add the project reference where you’ve added the method for custom processing in the previous step.

- In the Error Message field, you can add your custom error message to be rendered if there’s any issue while submitting the form.

- No changes are needed in the other fields, namely Editor and Robot Submission.
- In the Model Type field, typically add the project reference where you’ve added the method for custom processing in the previous step.
- Optionally, you can add an icon for the submit action. Here is the final look of your Sitecore tree with the custom submit action you created.
This custom submit action establishes a crucial link in the integration, facilitating the seamless flow of data from Sitecore forms to Salesforce Pardot.
Step 4: Adding the Custom Submit Action to the Sitecore Form
Create all the required fields in the Sitecore forms and add the Submit button.
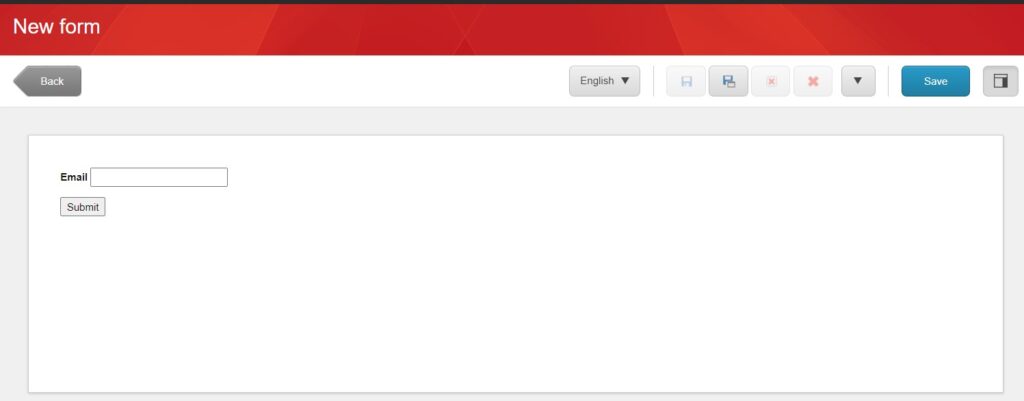
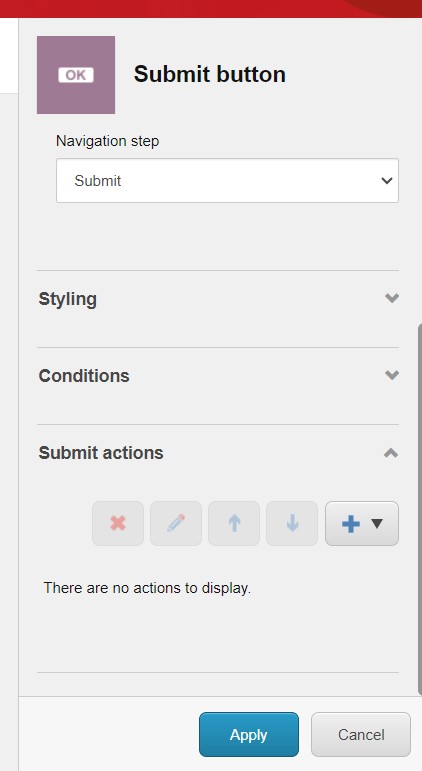
Now, it’s time to add actions to the Submit button. Click the Submit button and select “Add” under the Submit Actions dropdown.
I have added two actions: one that I created with customization for Pardot and another for the out-of-the-box action in Sitecore for storing submitted data in Sitecore.
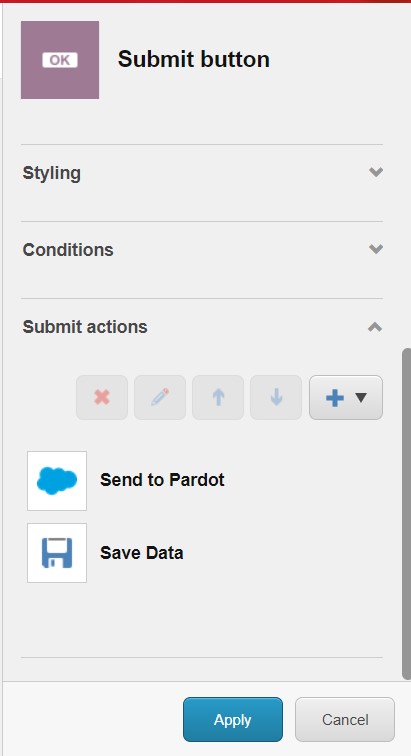
Disclaimer: The only issue arises with file uploads, as Pardot does not support file uploads. Therefore, any uploaded files will not be captured in Sitecore.
In this comprehensive guide, we navigated through the intricate process of integrating Salesforce Pardot with Sitecore forms, emphasizing the creation of a seamless data pipeline for form submissions. By crafting a custom form handler in Salesforce Pardot and implementing a robust code pipeline in C#, we established a reliable connection between Sitecore and Pardot, ensuring the accurate transmission of data.
The creation of a custom submit action within Sitecore played a pivotal role in bridging the gap between Sitecore forms and Salesforce Pardot. This action served as a crucial link in the integration, allowing for the effortless flow of data and the execution of custom logic.
While we encountered challenges, such as the limitation with file uploads in Pardot, the overall integration provides a solid foundation for organizations seeking to leverage the capabilities of both Sitecore and Salesforce Pardot in a unified manner.
By following these steps, organizations can enhance their marketing and customer relationship management strategies, ensuring a seamless and efficient process for capturing and managing form submissions. As technology evolves, the integration outlined in this guide positions businesses for greater success in leveraging the power of Sitecore and Salesforce Pardot in tandem.
Happy Coding!